(5 min read)
If you want supporters to purchase tickets for your event, you can create a Ticketed Event which can then be associated with an Online Actions event form to make it easier for attendees to sign up and pay for their tickets. Before you create your form, you'll need to set up your Event in the database.
Read more about creating Ticketed Event forms
If your organization is required to file compliance or disclosure reports, be sure to review the steps to follow to make sure your event will be tracked properly.
Read more about setting up events for compliance
Before you begin
Before you add a Ticketed Event, you should make sure that you have already set up the Designation and Gateways you plan to use to process your ticket purchases. During the event setup, you will be asked to link your event to an existing Designation. There is no way to retroactively apply a Designation after the event has been created.
Read more about Designations and Gateways
Creating a Ticketed Event
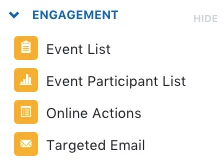
Once you are ready to begin, click on Event List in the Sidebar or on the main menu.
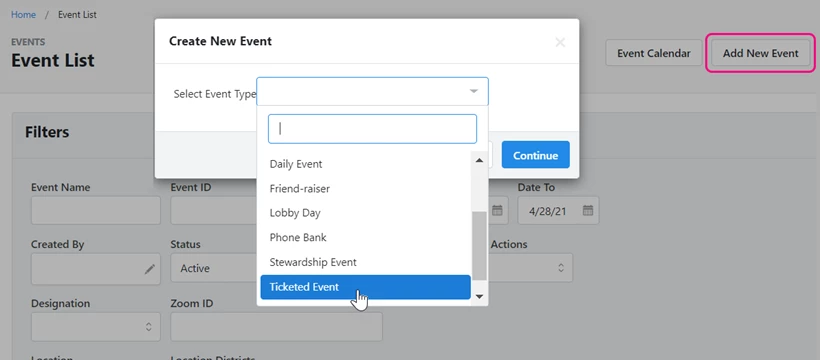
Select Add New Event and choose Ticketed Event for the Event Type. Then Continue.
The Event Setup Wizard will prompt you to add the basic details about your event, including:
- Name: Name your event.
- Short Name: You can choose a shorter name for your event. The longer name will still appear on the event form or for anything supporter-facing. You can use the short name for internal items such as reports.
- Campaign: Learn more about administering campaigns and contents.
- Date/Time From: The start date and time.
- Date/Time To: The end date and time.
- Description: An internal description about the event.
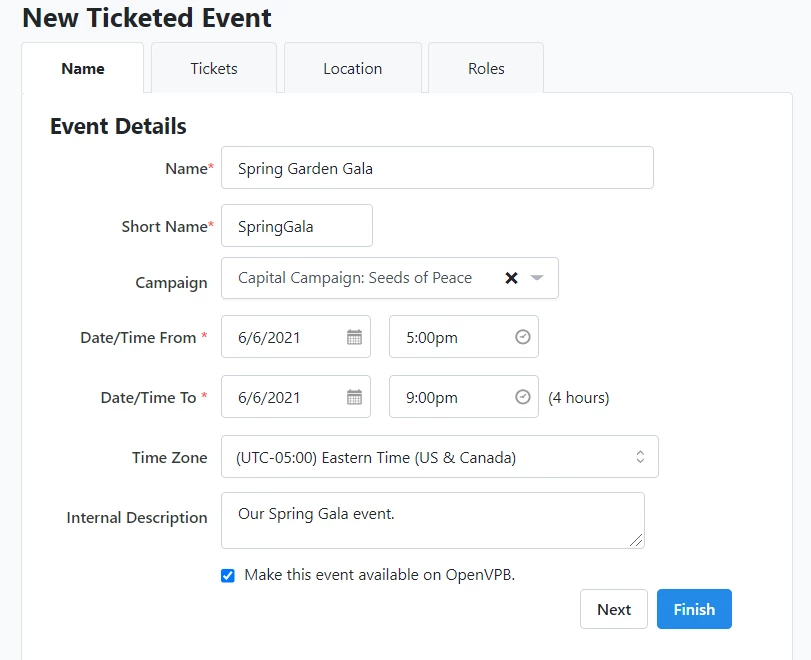
Once you've added the basic information, you can then add more details.
Adding Tickets
You can add tickets using the Ticket tab. You will first need to select your Designation. Adding a Source Code will help you track responses and contributions in your reporting. 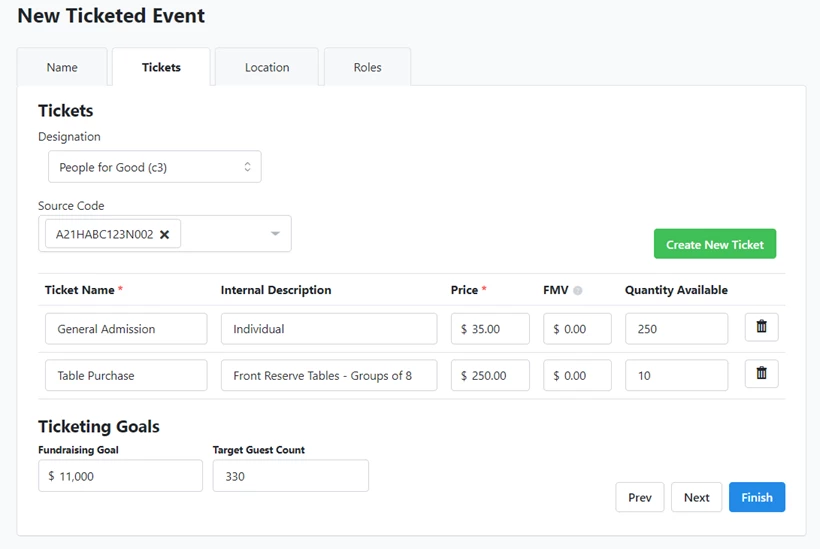
You can then add the information for at least one ticket type. You can add as many as you need using Create New Ticket.
If you need to delete a ticket type, click the trashcan icon.
To help you track your progress, enter your Fundraising Goal and/or Target Guest Count.
Adding Locations
Use the Location tab to choose one or more locations for the event. You can select from previous entries using the dropdown or use the link to Create New.

Adding Roles
Event Roles for Ticketed Events are set by default. You can choose which ones you want to appear on your Event Form using the Roles tab.
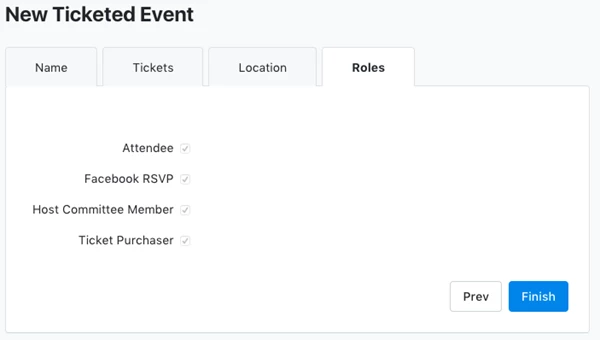
When you select Finish, you will be taken to the Event Details page, where you can make further adjustments to the event.
Adding additional information on the Event Details page
On the Event Details page, you can add more information about your event or monitor your progress.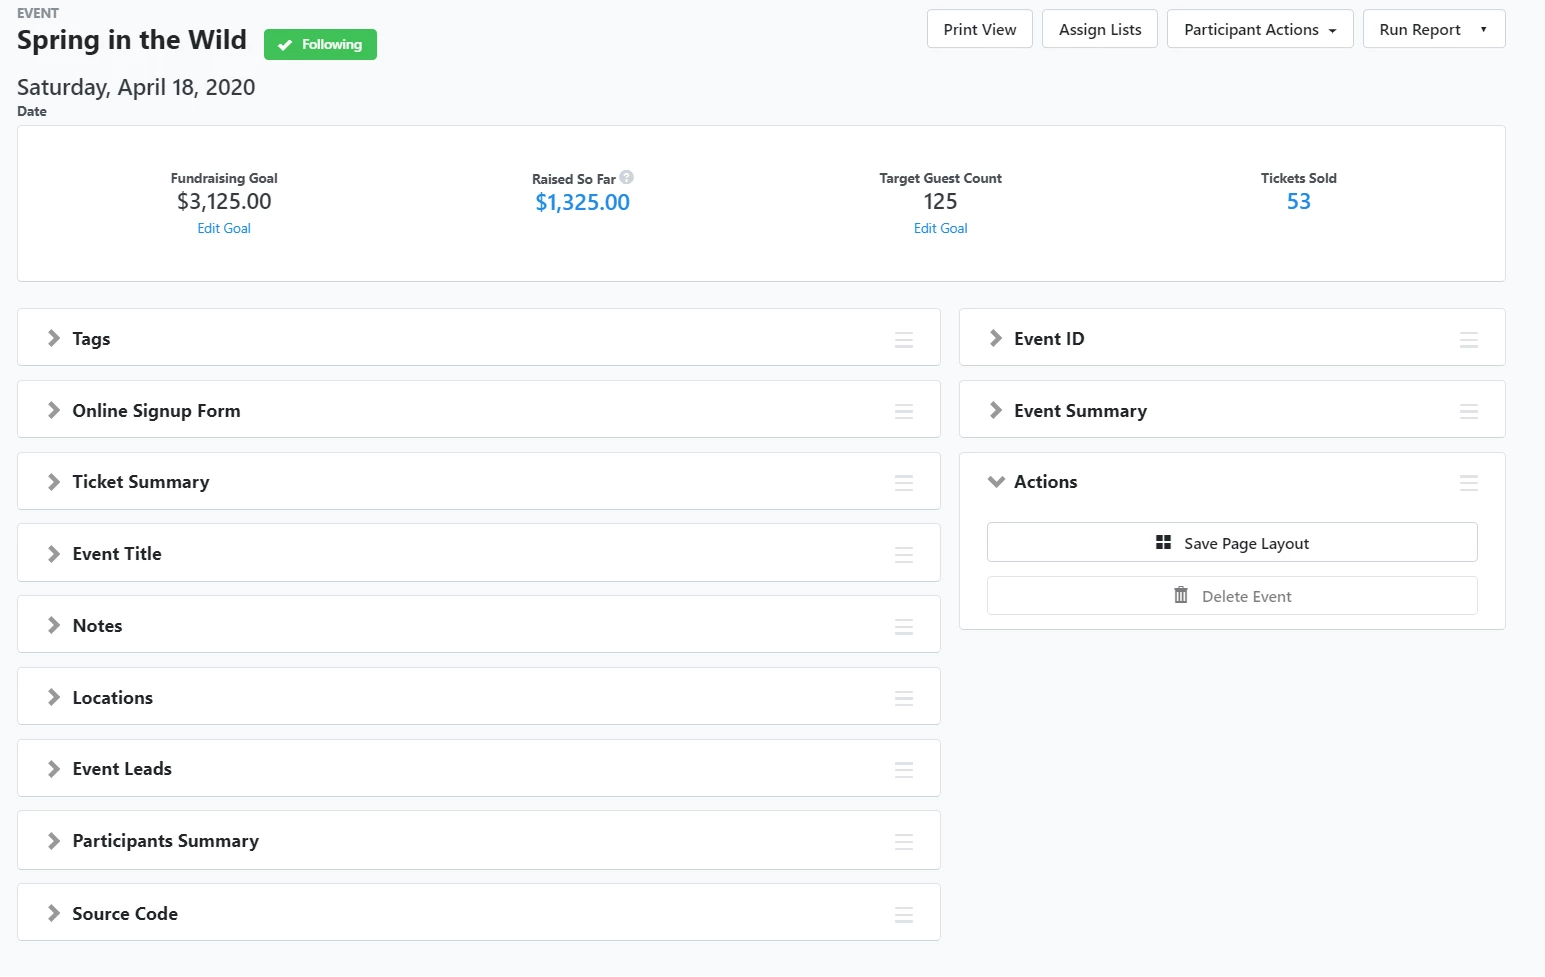
Some of the details you can add or track include:
- Tags: tags help you search for and track your event
- Online Signup Form: tracks your published signup forms associated with this event
- Ticket Summary: displays a summary of your progress and allows you to edit your ticket information
- Source Code: view and edit the source codes applied to the event
- Event Title: edit the name, date/time, and description of the event
- Notes: add notes about the event
- Locations: manage the location of the event
- Event Leads: add names of Host Committee members that may be helping to put the event together and drive ticket sales
- Participants Summary: displays the status of your contacts that are associated with the event. It does not include guest counts - in other words, its not counting ticket sales, just contact records. Guest names are not created as contact records in the database.
- Event Summary: tracks how well you are doing compared to your goals
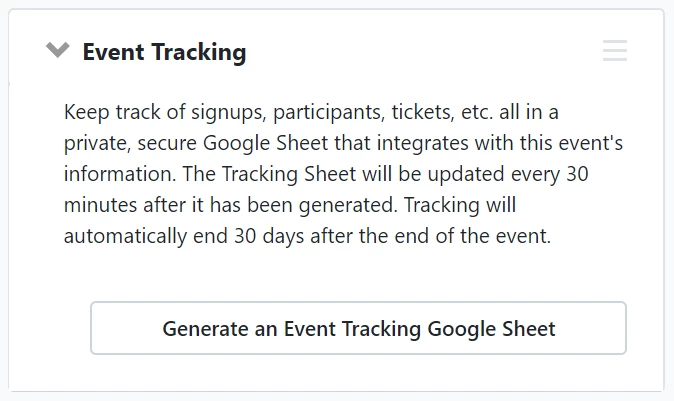
- Event Tracking: generates a tracking sheet that will automatically update whenever your records are updated (see below)
- Contributions: displays total contributions associated with the event
- Disbursements: displays all disbursements associated with the event
- Zoom Integration: if you have a Zoom integration, you can link your event to Zoom here
Tracking and managing your event
You can use the links at the top of the Event Details dashboard to create reports or generate participant lists.
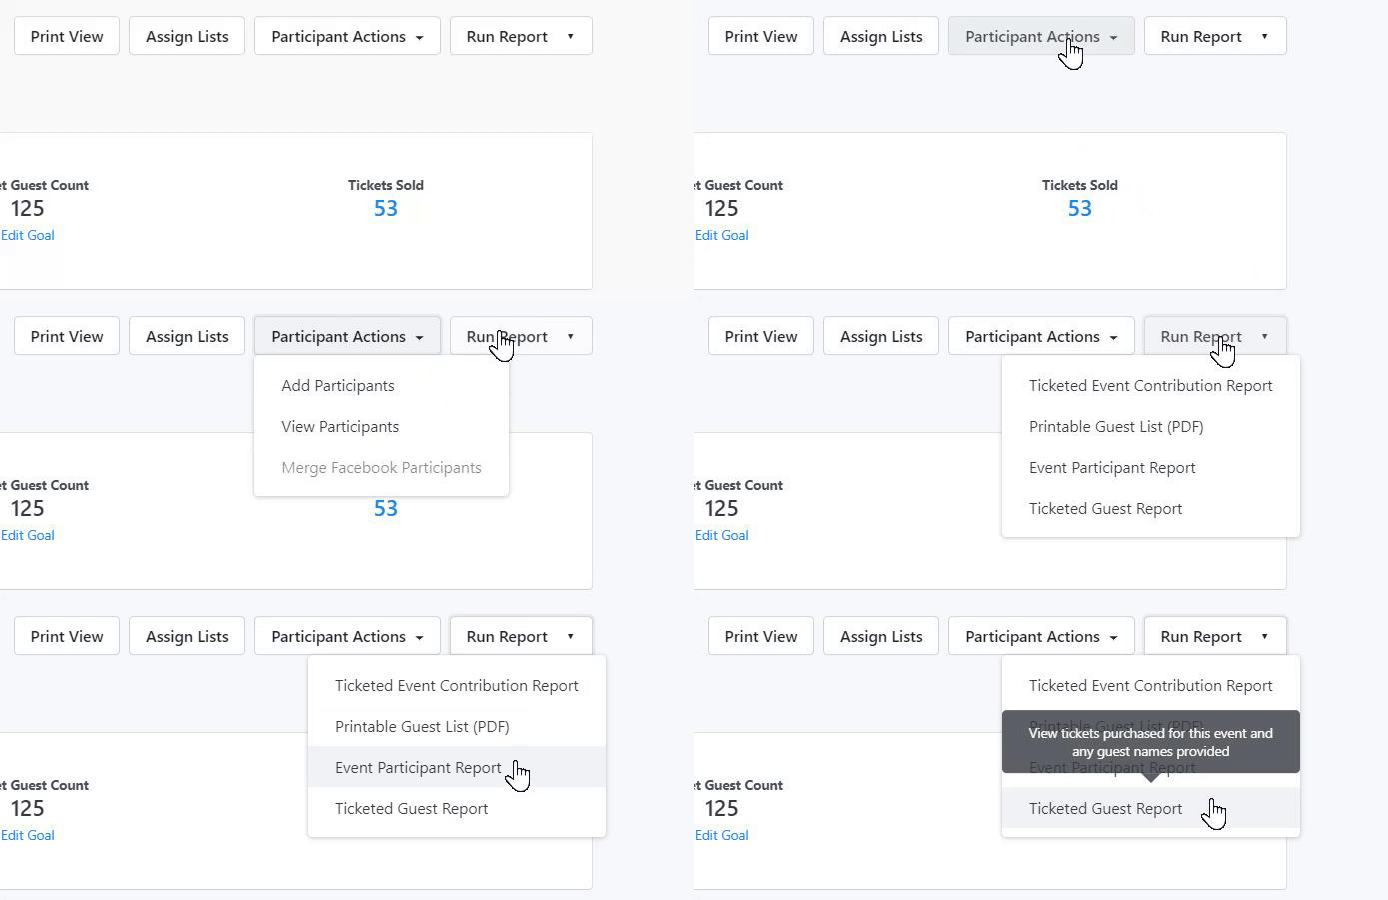
The actions you can take include:
- Print View: creates a printable PDF that includes a list of the event leads/host committee members, the Participant Summary, and Event Summary
- Assign Lists: assign participant or sign-up lists to various staff members
- Participant Actions: add participants, view the participant list, and Merge Facebook Participants
- Run Report: takes you to the Ticketed Event Contribution Report, lets you view or print the event participant list, or view the Ticketed Guest Report
Additionally, you can create an Event Tracking Google Sheet that you can give to your staff to use for check-in or sales that will automatically update whenever your records are updated. To create this tracking sheet, go to the Event Tracking section of the Event Details and select Generate an Event Tracking Google Sheet.
If you later need to change the Source Code on your event, you should review your contribution (and disbursements, if applicable) links. You may manually need to Unlink contributions assigned to the previous Source Code and manually Link the ones that match your event.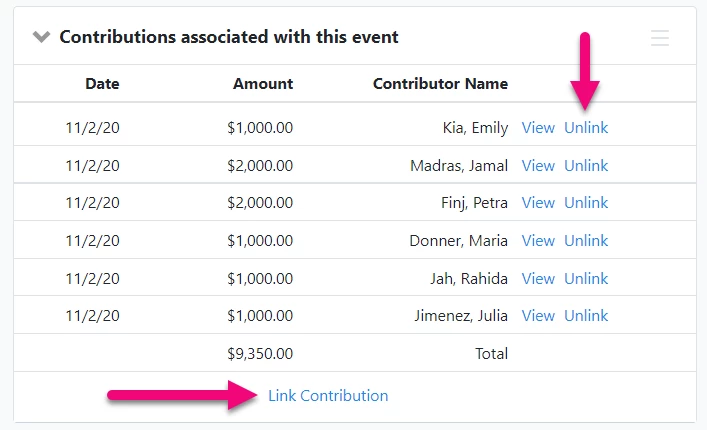
Searching on event details
From Create a List, you can search on your ticketed event details, including:
- Event Type: search for everyone who attended a particular type of event
- Event Name: find contacts from a particular event
- Role: find contacts with a particular role
- Status: find anyone with a particular status (Invited, Scheduled, Confirmed, etc)
- Location: find everyone attending any event at the location selected
- Event Date: find contacts attending any event within the date range selected
- Signup Date: find contacts who signed up within the date range selected
- Signed up from: find contacts who signed up for the number of events within the range provided
- Source Codes: find contacts who signed up for any event with the source code that was applied to that event
- Ticket Level: find contacts who have purchased a particular ticket level
- Ticket Count: find contacts who have purchased the number of tickets within the range provided
You can also see which events your contacts responded to by looking at the Events section of their contact record.
Reporting on your event
There are several reports you can run, including:
- Ticketed Event Contribution Report which helps you track the amount raised by your ticket sales and any additional contributions
- Printable Guest List that includes all ticket purchasers and guests on a PDF printable list
- Event Participant Report gives you information about your contacts who registered for a ticket. Since guest names are not necessarily added as contact records, this report does not include all guests' names entered by registrants.
- Ticketed Guest Report shows all tickets purchased and all guest names
You can also see everyone who responded using your Online Actions sign-up forms by using the Online Activity Report and narrowing the results by Form Name or Form Type. You can compare responses by filtering by Form Type and then Group by Form Name.
Read more about tracking responses to Online Actions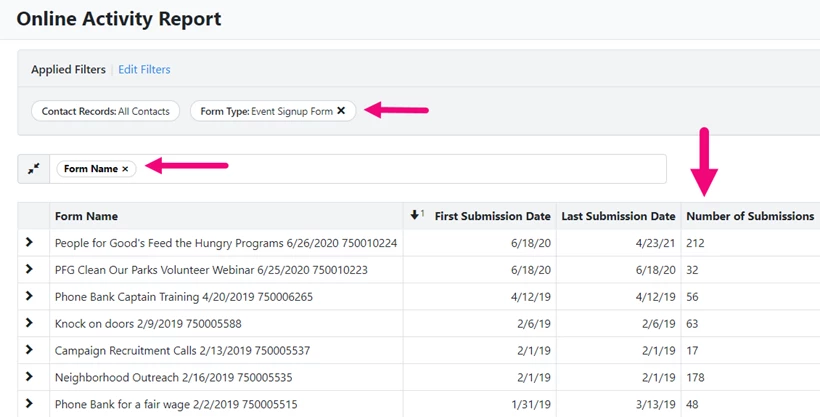
To get a report of how your supporters responded to the Interests and Additional Information sections, use the Online Forms Custom Questions Report in Report Manager, and select the event form associated with your event.
