(3 min read)
Growing your Planned Giving program depends on good cultivation of your contacts. When supporters respond to your solicitations asking for more information, you can add that first Information Request to their record by creating a Planned Giving Plan for them and then continue to update their contact record using Activist Codes to track any subsequent planned giving info requests or responses to planned giving mailing surveys.
Adding an Information Request to an individual record
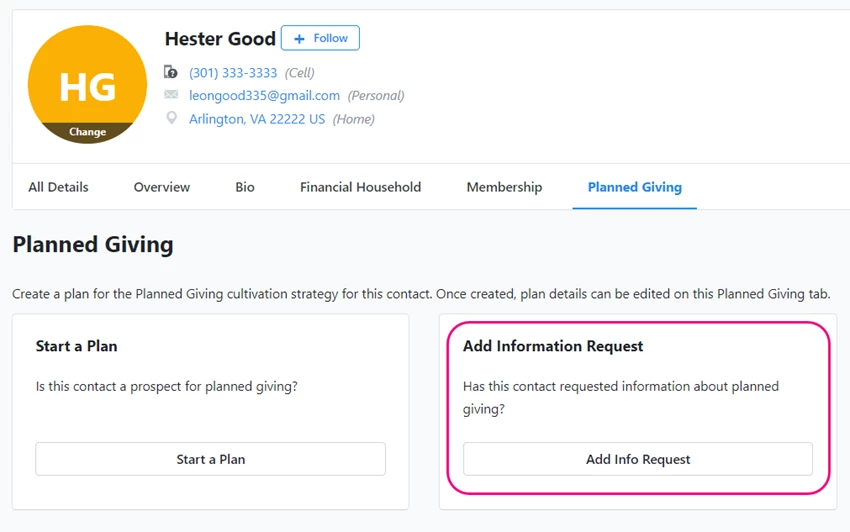
Once you receive the first Information Request, you can begin a new Planned Giving Plan for your contact by opening the Planned Giving page on your contact’s record and selecting Add Information Request to add a new Information Request. Open the Planned Giving page on your contact’s record and select Add Information Request.
You’ll need to add a Request Date and a Source Code. The source code will help you track which effort the donor responded to when you create your reports or searches.
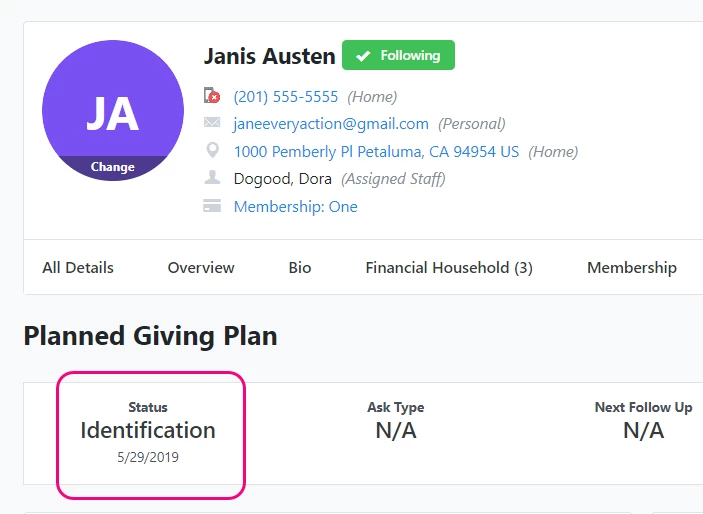
Once you select Continue, you will see that the status for your contact is set to Identification. You can later search on this status to find the contacts you want to target for future follow-up or outreach efforts. You’ll be able to update their status at every step of the cultivation process and track your progress in your reports.
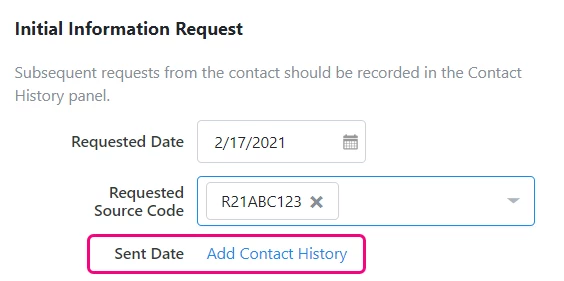
After logging the Information Request, you will be able to add details from your follow-up with your contact. From the Initial Information Request section of their record, select Add Contact History to add the Sent Date and additional details of your follow-up.
If you are entering similar Information Requests on multiple records in a row, or if most Information Requests share similar details, you can use Remember Preferences to save time.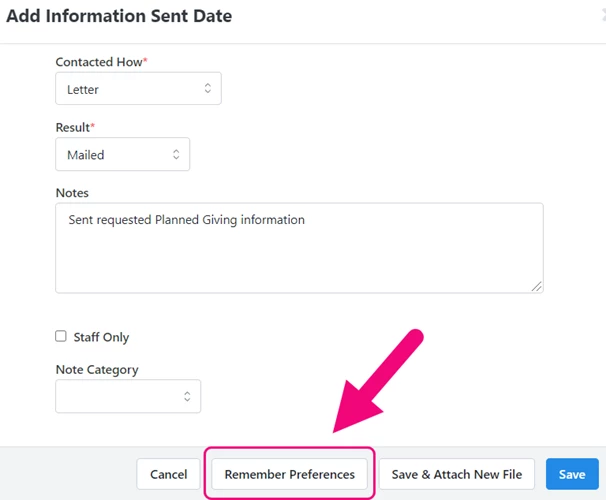
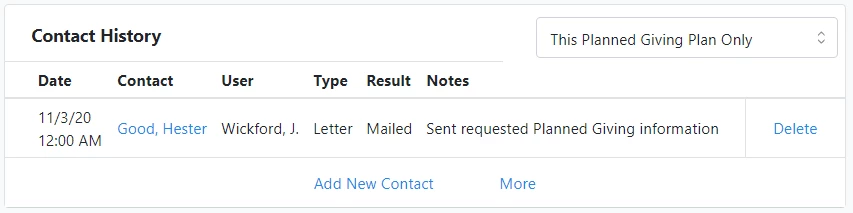
Once you have saved the details, the Sent Date will appear in the Initial Information Request section of the contact record and the remaining details will appear in the Contact History section.
Using Bulk Upload and Bulk Apply to track information requests
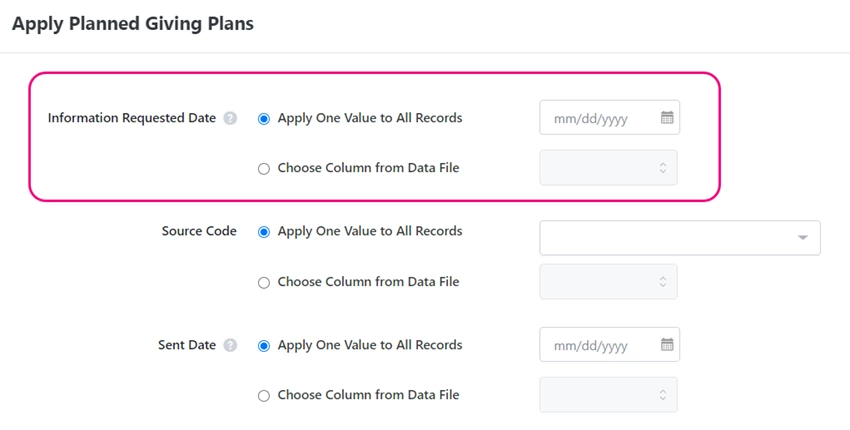
You can also add new requests for information to multiple records at once by creating a list of contacts and using Bulk Apply or by applying the date for the request when you Bulk Upload responses from your outreach efforts.
To add the new Information Request to your selected records, use the Apply Planned Giving Plans mapping option and adding the Information Requested Date.
Tracking responses from Direct Mail outreach efforts
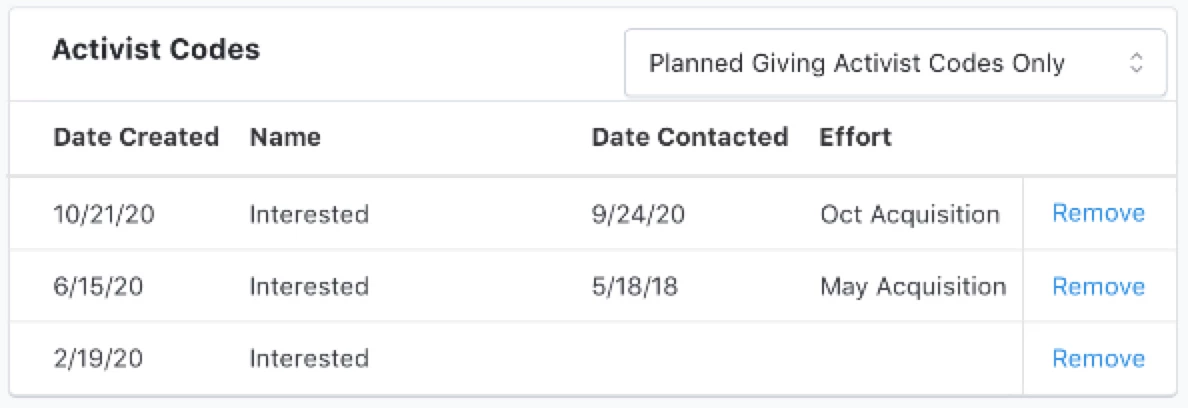
If you use the Direct Response Plans as part of the Development Pro package, you can also track planned giving information requests as donors respond to your Direct Mail outreach by applying Activist Codes.
To help you track information requests across all mailings, we recommend that you add and apply a single activist code of the type Planned Giving
As you Bulk Upload the responses to your mailing, you can use Apply New Mapping > Apply Direct Response >Data Type > Direct Mail Responses (Activist Codes) and then select your planned giving information request Activist Code.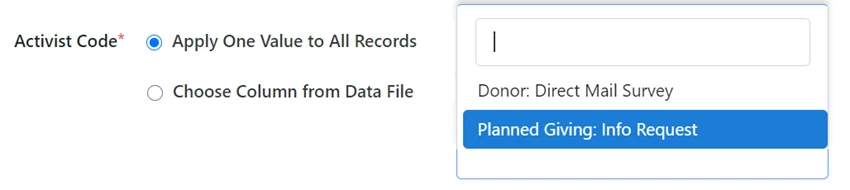
You can also use Apply Planned Giving to update your records in a similar manner. This will allow you to also track information requests for all your contacts and create new Planned Giving Plans for contacts who are responding for the first time. Using both mappings will give you more ways to analyze your responses. You can use both mappings in a single bulk upload.
Read more about tracking Direct Mail Engagement responses
Any responses that were added using the Direct Response mapping will appear on the individual contact record Activity Stream.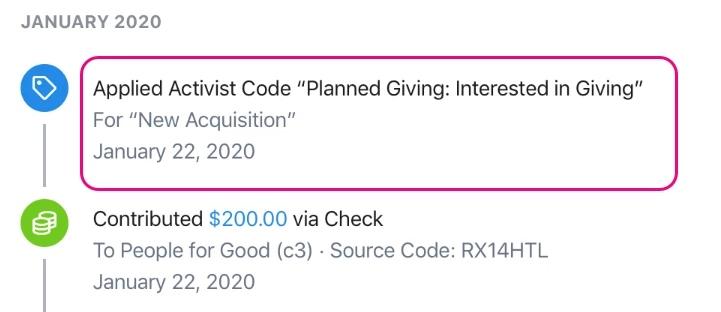
You can also view the requests from the Activist Codes sections of the contact record’s Planned Giving Plan page or their Details page.