

(3 min read)
When acquiring new donors or prospects via mail or email, you should use Eliminator Files (or suppression files) to make sure you are not paying to acquire contacts that you already have on file. Eliminator files can be created and downloaded right from your database and provided to your vendor.
Once your acquisition effort is finished, you can then use the Finder Files your vendor gives you to easily add your new contacts.
Read more on Finder Files
Creating your exclusion list
Go to Create a List and choose which contacts you want your vendor to exclude from their list.
Be as broad as you can in your search to make sure you capture any contacts that might appear in the vendor list that you do not need. For example, you may want to include deceased or do not mail contacts to be certain you are not reacquiring those names. From Suppressions, you can choose Include Deceased and Include Do Not Mail contacts to add to your list.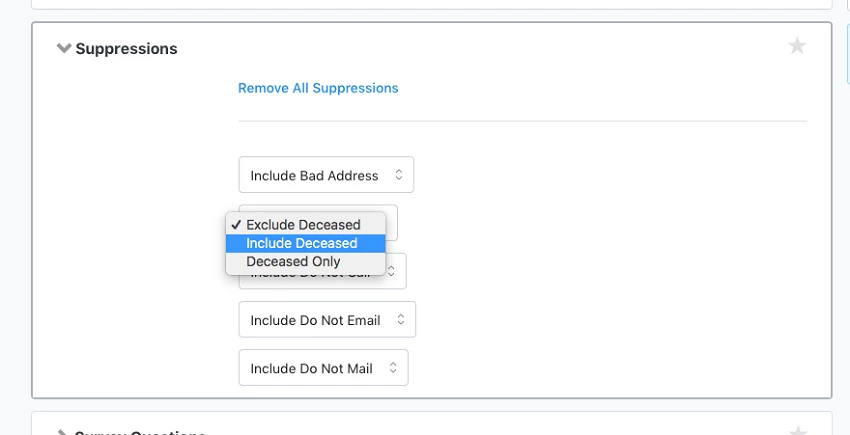
Note: When you create the final eliminator file, the system will also automatically add any contacts that were deleted in the past 12 months (with the exception of merged records).
Be sure to save this search so that you can use the same criteria every time you need to send your vendor(s) an eliminator file.
Exporting the file
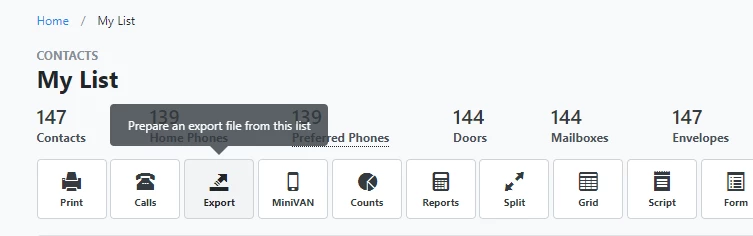
Once you've run the search you created above, you're ready to export your eliminator file. Choose Export to begin.
On the Export Wizard screen, select either Email Eliminator File or Mail Eliminator File from the dropdown menu and then choose Customize Export.
For Mail Eliminator Files, you can choose whether you want it to export as an Excel file or a tab-delimited text file. You can also choose a filename for the download.
The exported file includes one row for each name and address combination from your selected contacts. This means, for example, that if Jerald Rivera has a home address and a work address, he will show up in the file twice (once for each address). 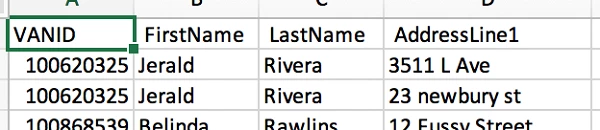
The Email Eliminator File has similar options for formatting and naming the file. You can also specify how you want to hash the email address. This adds an extra layer of security when transmitting the file to your vendor. The default is SHA1, but you can also choose MD5 or no hashing (emails will be transmitted in clear text). Be sure to choose a hash that is compatible with your vendor's system.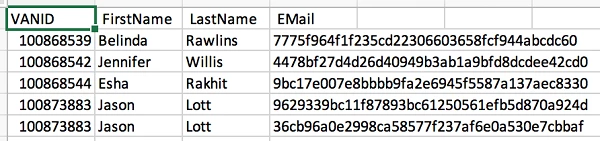
*If you skip the customization step and simply choose Export Now, your eliminator file will be exported as an Excel spreadsheet with the default filename. If it is an email eliminator file, the file will use default hash of SHA1 for email addresses.
Transmitting your file to the list vendor
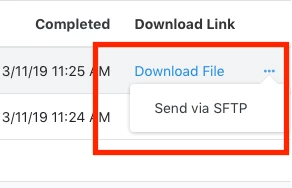
You can find your exported file under Main Menu > My Export Files. Download your file to transmit to your list broker. Our Digital and Development Pro clients also have the option to upload the file to their vendor immediately via secure FTP. You will find this option under the Action Dropdown menu (three dots).
If you select the FTP option, you will be directed to a page where you can enter the credentials for uploading to your vendor. You'll need to know the hostname and port number, the username, and the password for the site. We do not store these credentials, so you'll have to enter this information every time you want to use the FTP feature.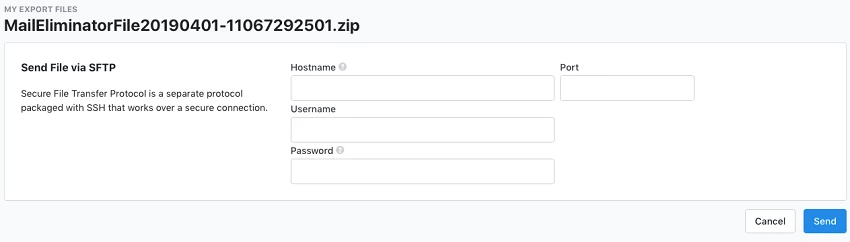
Once your information is entered, just click Send. You will be taken to a confirmation screen where you can see if your file was uploaded successfully or not.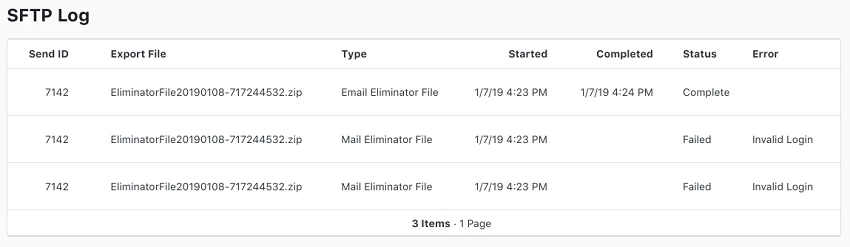
Troubleshooting your file
If you see that a file transfer failed, be sure to check that your credentials were entered correctly. If the credentials are correct but it still fails, contact your list vendor and verify that your username and account are set up correctly. Common reasons for failure are:
- Your username has read-only access for the destination server
- Your username has no permissions for the destination server
- Your username has no default folder on the destination server to hold the file