

(4 min read)
The Event Attendee Check-In page allows you to see the list of attendees for your event and use it to check them in, modify their status, add a note to their record, or add new names to your list.
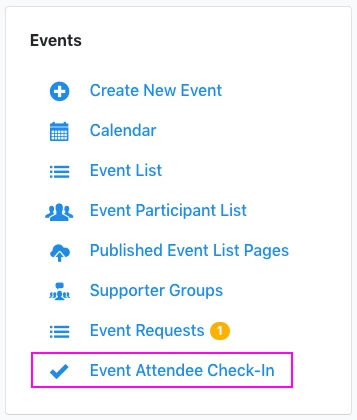
Opening the check-in page
You can find any check-in page from the Events section of the Main Menu or from the left-hand sidebar.
Once you've selected Event Attendee Check-In, you'll be asked to search for an event or choose from the default list of Followed events below the search area.
Followed events include any events you created, as well as any you marked using the Follow button on the overview page for the event.
Following events is recommended to help you quickly find the events that you'll be involved with.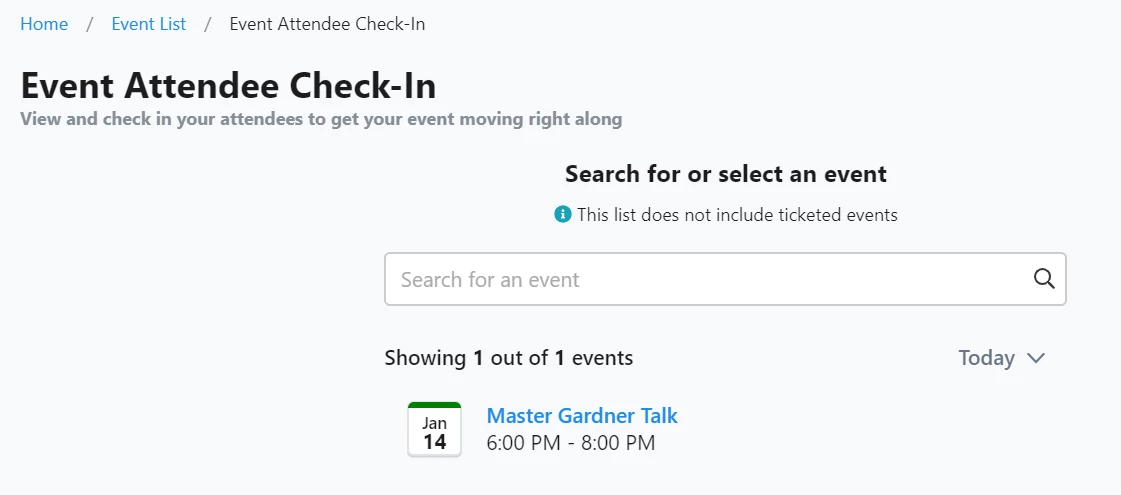
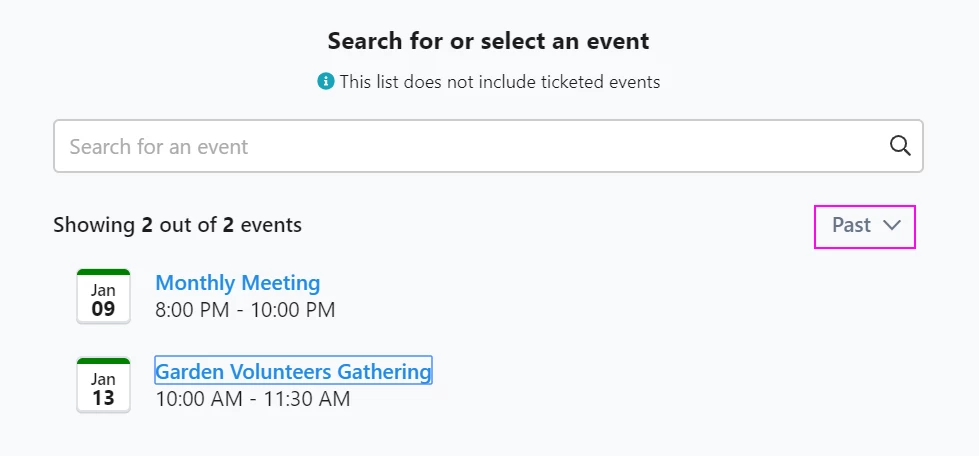
The list will default to the events happening Today but you can also filter the display to see Past (last 7 days), or Upcoming (in the next 7 days) events. This will not filter your search results, only your Followed list.
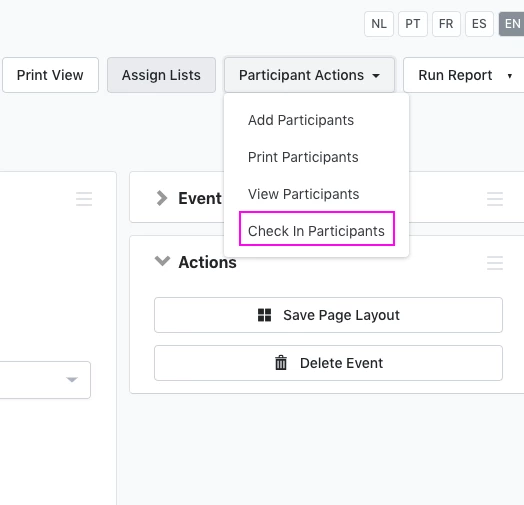
You can also go directly to an Event Attendee Check-In from the detail page for an individual event. Select Participant Actions > Check In Participants to go directly to the check-in page for that event.
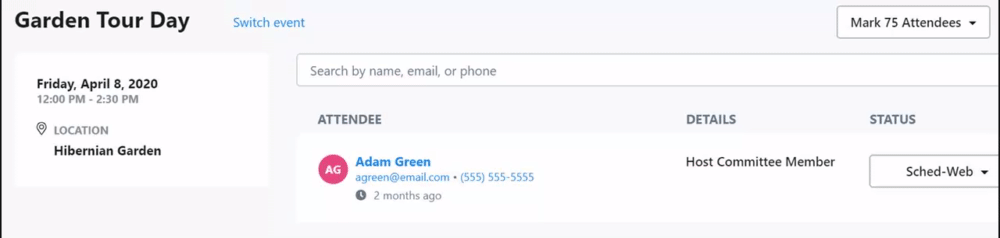
Viewing your attendee list
Once you've opened the correct check-in page, you'll see a summary of the event details on the left-hand side of the screen.
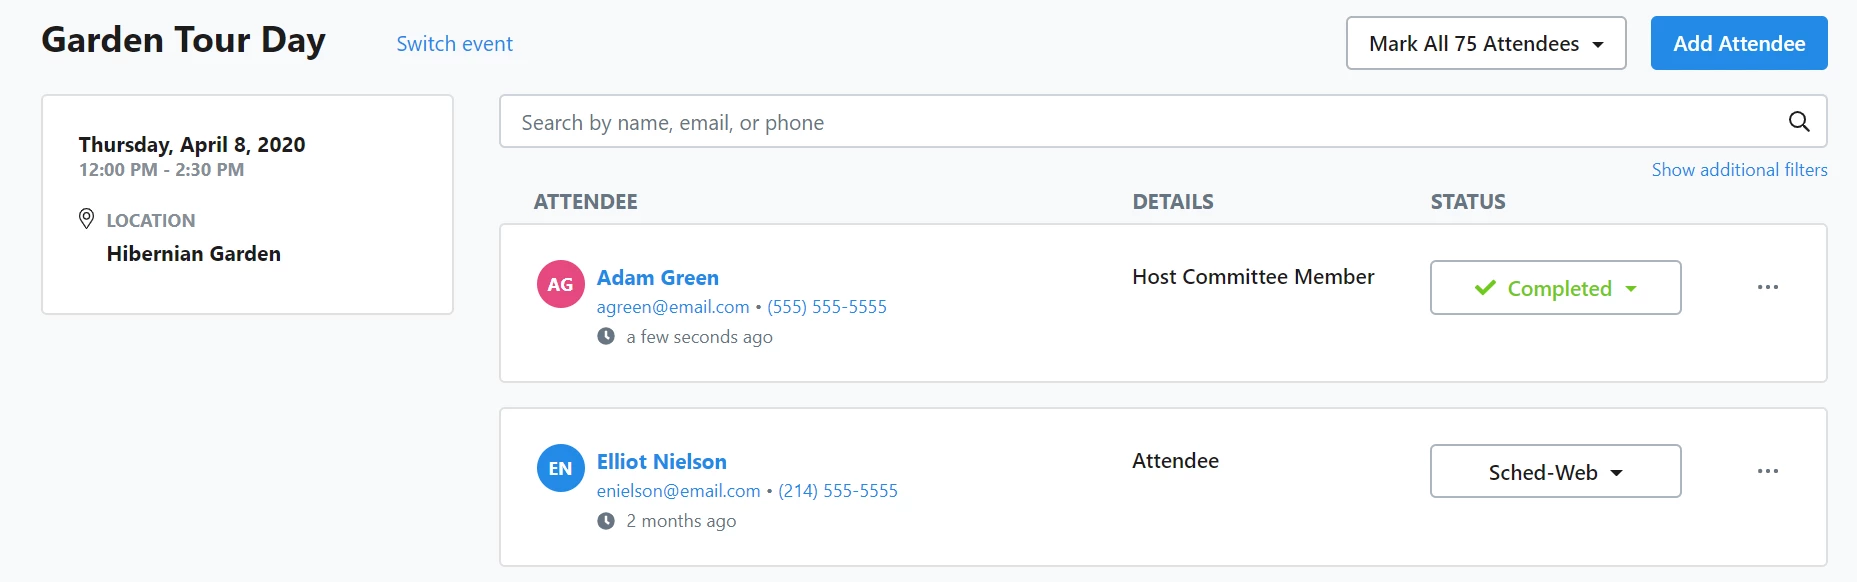
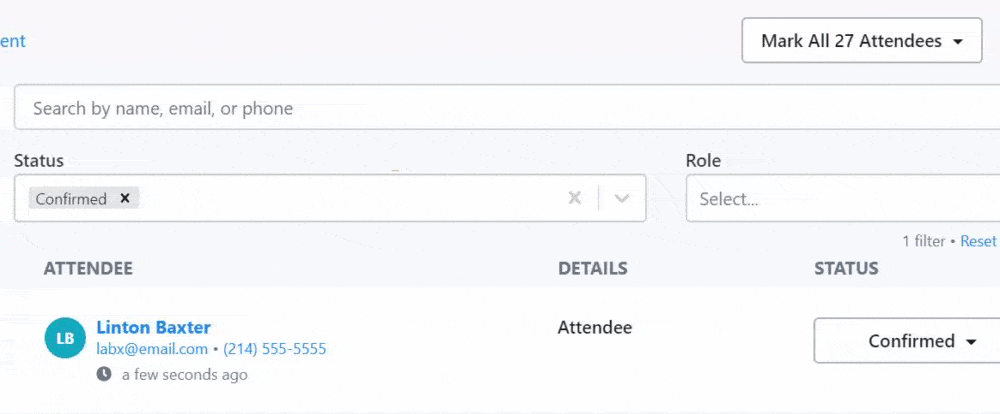
On the right, you'll see an option to search for particular attendees by name, email, or phone number. You can also Show additional filters to further narrow the list by their confirmation status, their assigned shift, their location, or their role. What you see for filtering will depend on how you set up your event.

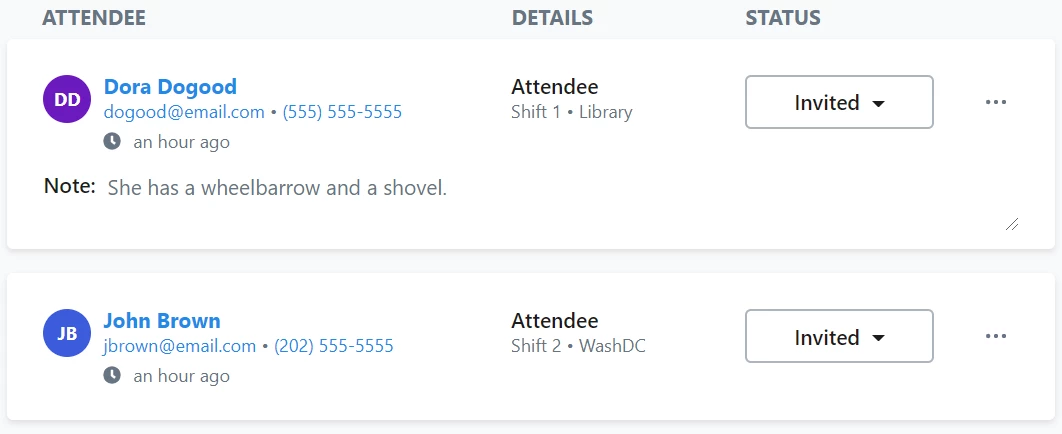
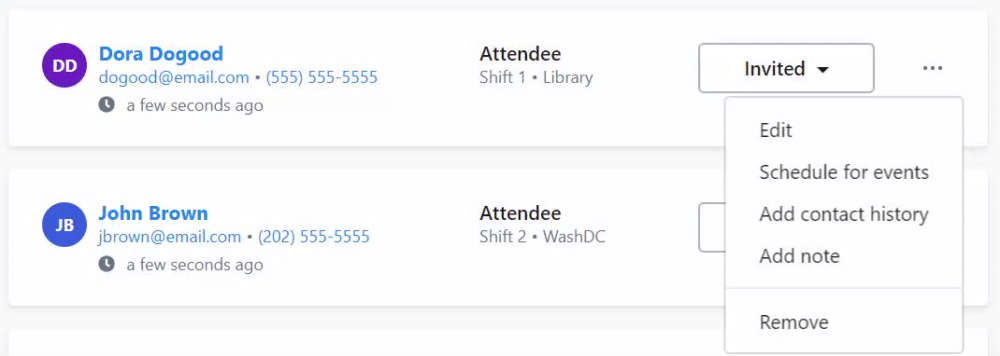
Below the search area, you'll see a list of all current attendees, along with their contact information, when the record was last updated, and brief details about the attendee's role, shift, and location. If the attendee is participating in a different time range than the shift, their specific scheduled time will appear instead.
You can also click on the attendee name to view their contact record or select their email address or phone number to place a call, make a text, or email your attendee from your desktop or mobile device.
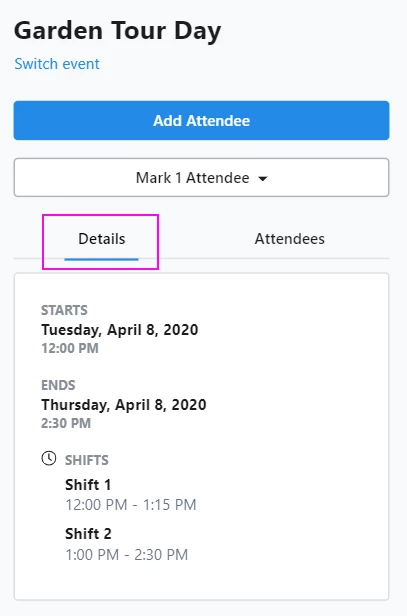
On mobile devices, you will see the search box at the top of the page, followed by tabs that let you toggle between your event summary Details and your Attendees list.

Adding an attendee
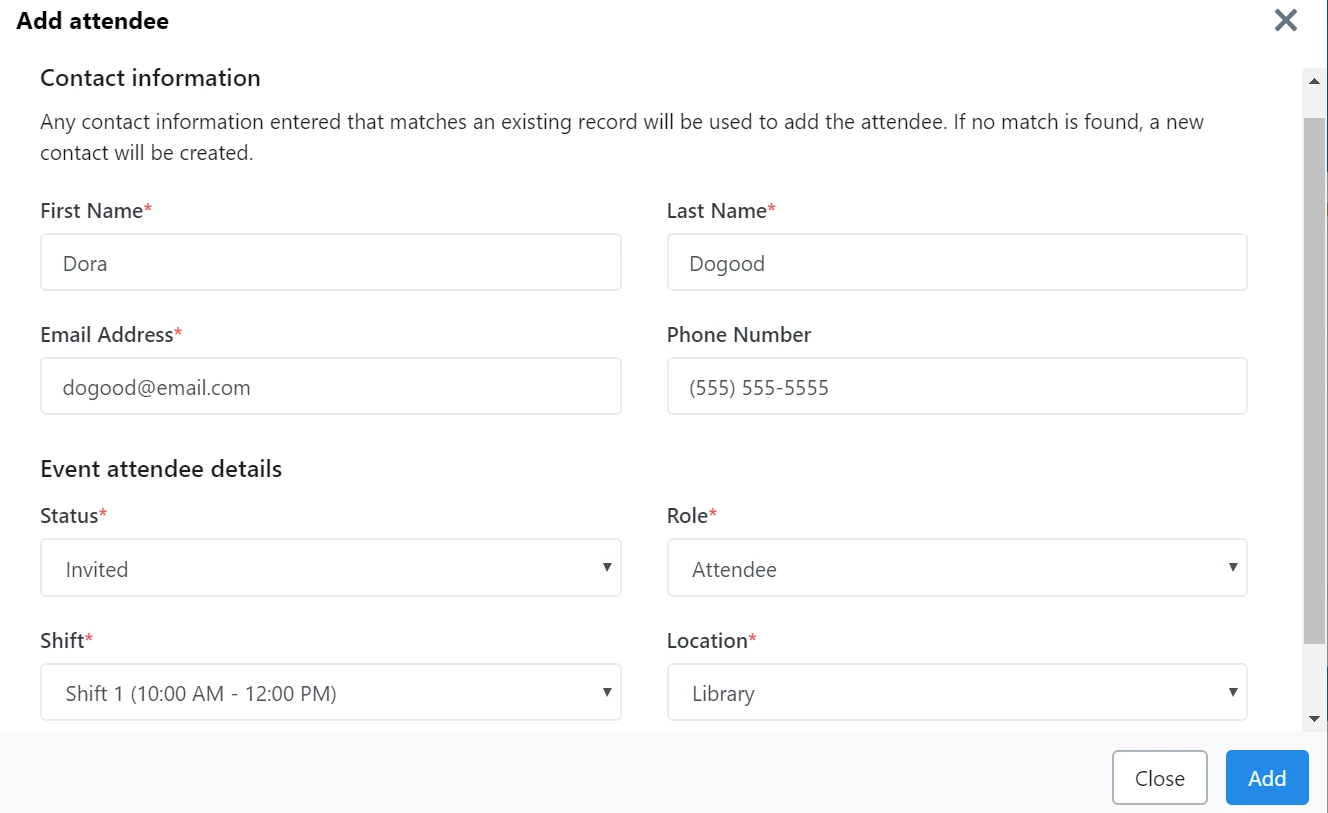
If you need to add an attendee, you can use Add Attendee. This option will let you search for an existing contact to add as an attendee using their first name, last name, email, or phone number. If the contact does not exist, it will add the new contact to your records. Attendee details will depend on how you set up your event.
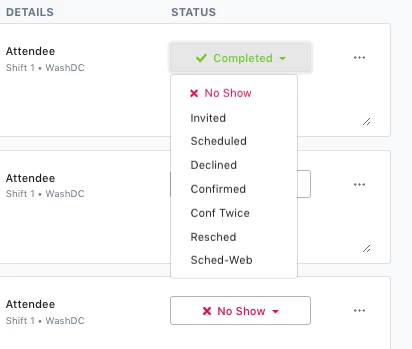
Marking attendee status
As attendees arrive or contact you about the event, you can easily update their Status using the dropdown next to their record.
Editing your attendee's information
You can also edit your attendee's information using the action dropdown menu (...) next to their name.
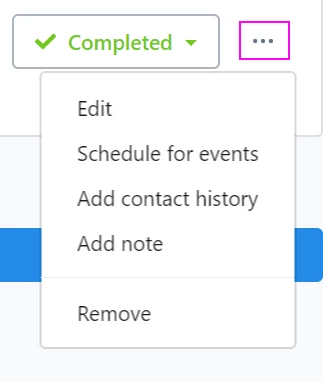
From this menu, you can:
- Edit - edit items such as your attendee's shift, location, or role for the current event
- Schedule for events - sign your attendee up for other events using the Event Scheduler
- Add contact history - log any contact you had with your attendee and add an entry to their contact record with the date and method of contact
- Add note - add a brief note to your attendee's record that will appear on the check-in page under their name
- Remove - remove an attendee from your list
After you have added a note to your attendee's record, you can also remove or edit it as needed.
Editing attendee status for several records at once
If you get to the end of your event and you'd like to update the status of several attendees in bulk (such as participants who previously Confirmed but were No Shows), you can create a list using the search feature and then use Mark All to apply the change in status.
Switching between event check-in pages
If you have several events happening at the same time, or you need to edit your attendee information from another event on the fly, you can easily change to another check-in page using Switch event.
How do I how to: use event attendee check-in for non-ticketed events? | How does how to: use event attendee check-in for non-ticketed events work in EveryAction? | Why can't I how to: use event attendee check-in for non-ticketed events? | Where do I how to: use event attendee check-in for non-ticketed events in EveryAction? | What is how to: use event attendee check-in for non-ticketed events in EveryAction? | How to how to: use event attendee check-in for non-ticketed events? | Can I how to: use event attendee check-in for non-ticketed events in EveryAction?