

(6 min read)
Pipeline Cloud gives you access to the raw data in your EveryAction/NGP VAN records with an easy to use add-on integration. Contact your Account Manager to sign up for this integration. Be sure to provide us with the email address you plan to use to manage your Pipeline Cloud integration. You will need access to it for the setup process.
Read an overview of Pipeline Cloud
Once you’ve signed up for this integration, setup is simple and straightforward using the Microsoft Azure Active Directory setup process.
To set up your connection you will need to complete the following steps:
-
You should install an authentication app on your phone to allow secure logins. You can use an existing app if you already have one or follow the directions below to install a new one.
-
Once you receive the email invitation to set up your login, you will need to Accept the link to finish setting up your login and authenticator app.
- Install or update query tools that will support Azure Active Directory - universal with MFA authentication. We’ve included instructions on setting up SQL Server Management Studio and Azure Data Studio. If you already have these installed, make sure to update them to work with Pipeline.
Installing an authentication mobile app
Before beginning the setup process, you will need to install Microsoft Authenticator on your phone. The use of this authenticator will help secure your data and make sure only authorized users are able to set up the data integration.
The app supports:
-
Google Android
- Mac iOS
NOTE: Azure Active Directory also works with Duo and Okta authentication mobile apps.
 Read more on MS Authenticator mobile app
Setting up Pipeline Cloud
Once your Account Manager has notified you that your Pipeline Cloud integration is ready for set up, you should receive an email from Microsoft Invitations on behalf of EveryAction/NGP VAN. Please make sure that the invitation you receive is authentic by confirming that the sender address is invites@microsoft.com and that the domain information at the top of the email is eaclientaccess.com.
At the bottom of the email, select Accept Invitation to begin the setup process.

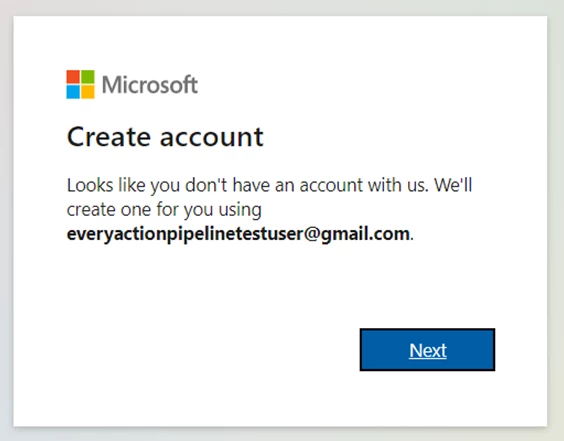
You will be prompted to create a new Microsoft user account to use with the Azure Active Directory using the email address you provided to your Account Manager.
Workflows may vary considerably in the account creation process. If you already have an Azure Active Directory account or are currently signed into one, follow the prompts. You will be guided to sign-out and/or switch accounts in addition to the account creation process. We recommend that you use the Chrome browser.
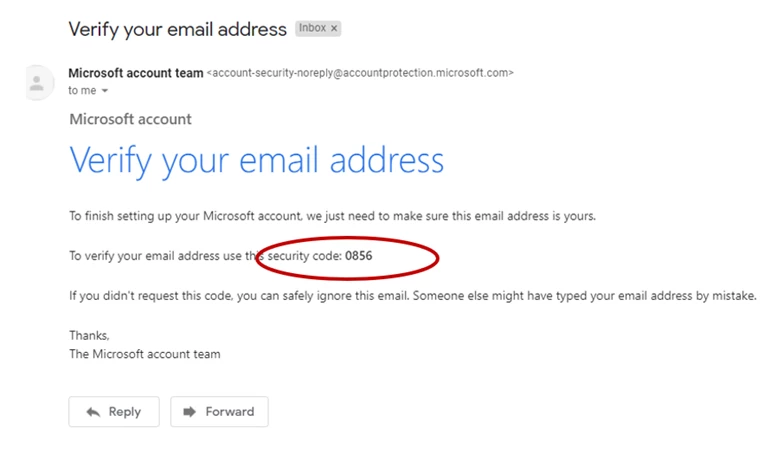
After you add the usual details required for a new user account, you will be asked to verify your email address using a security code. Check your email for the security code and copy it.
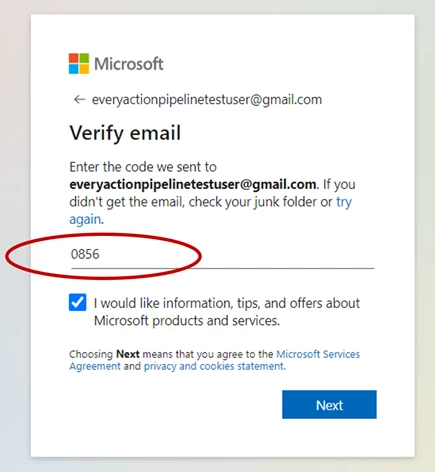
Enter or paste the security code in the verify email window. Click Next and then answer the CAPTCHA challenge to authenticate your response.
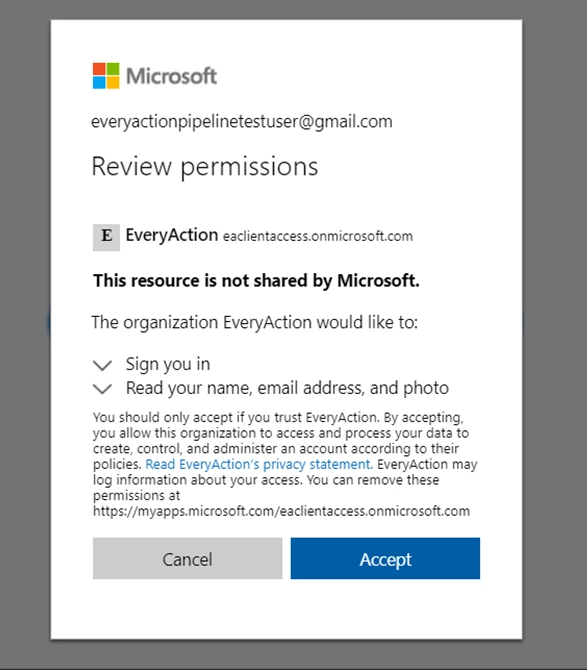
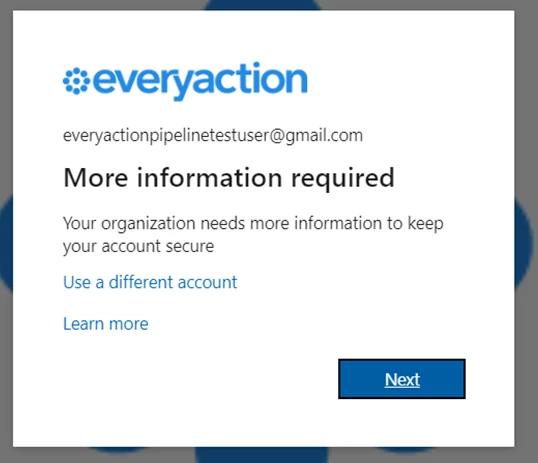
You will need to confirm that you wish to link your Microsoft account to EveryAction/NGP VAN.
You will then be notified by EveryAction that we wish to add additional security measures for this connection. This is an important step in the process since it allows you to enable two-factor authentication (2FA) on your account.
Make sure that the Mobile app > Use verification code option is selected. This will enable authentication using your Microsoft Authenticator.

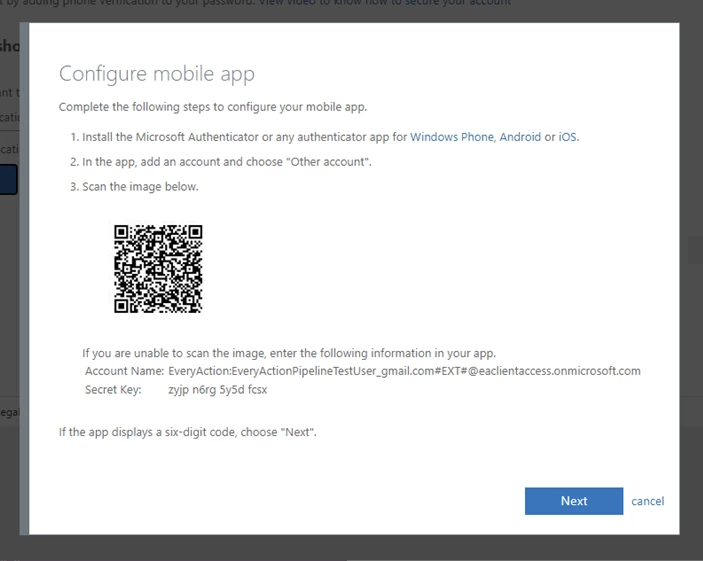
Once you select Set up, you will be prompted to add this account to your Microsoft Authenticator.
-
Open the app on your phone or device and in the upper right corner click the plus sign ( + ).
-
Select Work or school account as the type of account
-
Use your phone camera on the QR code displayed in the Additional security verification window. This will add this account to your MS Authenticator.
After the account is successfully added, return to the Configure mobile app window and click Next.
To confirm that the link was set up successfully, you will be asked to Enter the verification code from the mobile app. Enter the code you see in MS Authenticator for this link and click Verify.
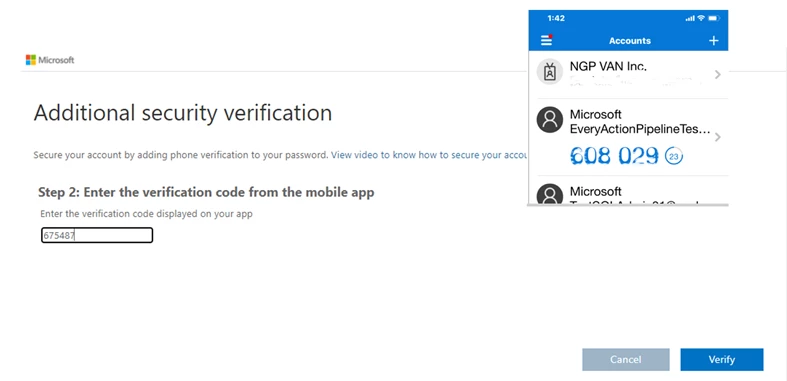
Once initial validation is complete, click Done.
Selecting tools to connect to your database
Once you have completed the initial setup and validation process, you will automatically be taken to the landing page myapplications.microsoft.com (formerly Azure Access Panel) as an authenticated user. You will see links to several query tools you can install that will make it easier to query and connect to your database.

The SQL Server Management Studio (PC) combines a broad group of graphical tools with a number of rich script editors to help you build queries and scripts as well as deploy, monitor, and upgrade the data-tier components used by your applications.
 Download SQL Server Management Studio
Azure Data Studio (PC and Mac) is an editing tool that lets you run on-demand SQL queries, include code snippets, view and save results, edit data, use an integrated terminal for command-line tools, organize your database connections, and browse database objects.
 Download Azure Data Studio (Windows and Mac)
If you prefer to use a command-line utility, we recommend that you use SQLCMD. This works well with multi-factor authentication and you can wrap PowerShell around it to extend its capability.
 Download SQLCMD
Setting up the connection with SQL Server Management Studio (PC)
If you already have SQL Server Management Studio (SSMS) installed, verify that you have version 18.6 or higher.
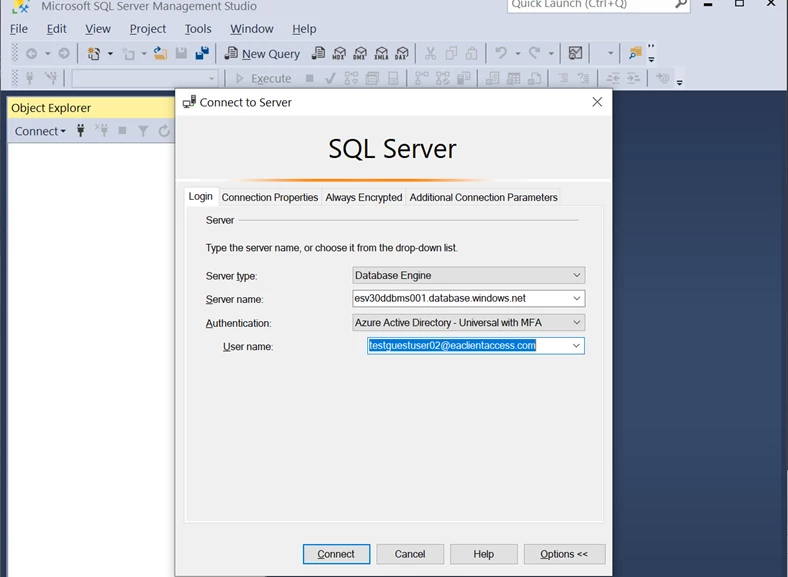
The first time you connect using SQL Server Management Studio (SSMS), you will need to add the settings for your connection. From the Connect to Server dialogue box, select Connection Properties and make sure you have the following settings:
-
Server Type: Database Engine
-
Example Server Name: esv30ddbms001.database.windows.net (The server listed here is an example server. You will need to pull your server information from your welcome email.)
-
Authentication: Azure Active Directory - Universal with MFA.
-
User name: your email address for managing pipeline
Next, click Options. On the Connection Properties tab, enter the following:
-
Connect to database: Name of Database in the invitation email. This is required.
Click Connect.
If you do not see Connection Properties, use the Options link at the bottom of the dialogue box to open it.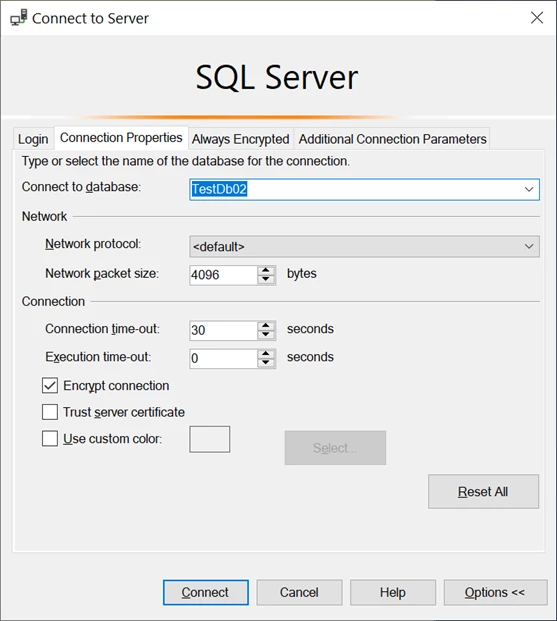
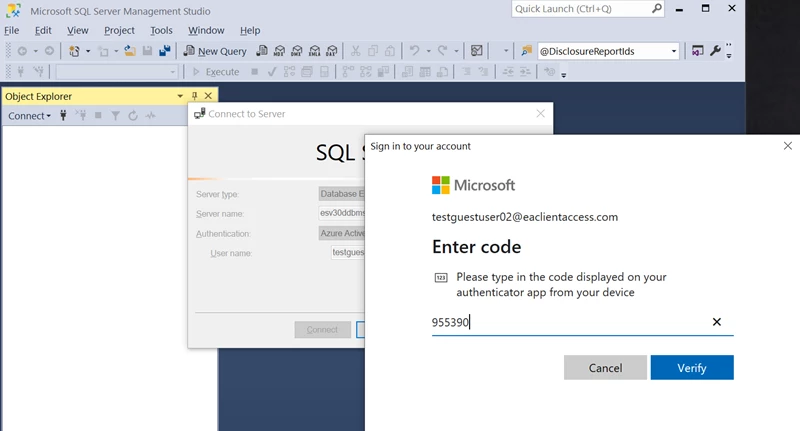
You will be asked to sign in to your Microsoft account and verify the connection using the security code from your MS Authenticator.
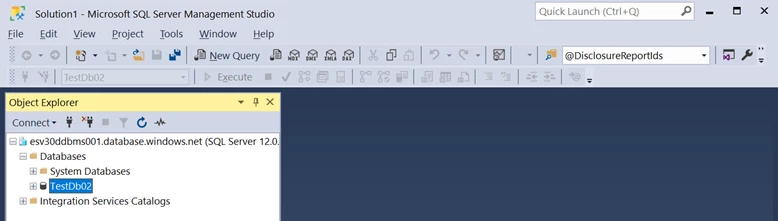
A successful login will show the new connection in your list of available databases.
Setting up the connection with Azure Data Studio (Mac and PC)
If you already have Azure Data Studio, installed, verify that you have version 1.23.0 or higher.
Before you begin adding new connections in Azure Data Studio, you will want to remove any previous connections to prevent or eliminate the connection error Login failed for user <token-identified principal>. To clear old connections:
-
Click on the person icon in the bottom left corner of Azure Data Studio. Any linked accounts will display.
-
Click the X to delete the old connection.
-
Click Yes on the confirmation modal.
To add your new connection, select New Connection and begin by adding these details:
-
Connection type: Microsoft SQL Server
-
Example Server: esv30ddbms001.database.windows.net (The server listed here is an example server. You will need to pull your server information from your welcome email.)
-
Authentication type: Azure Active Directory - Universal with MFA
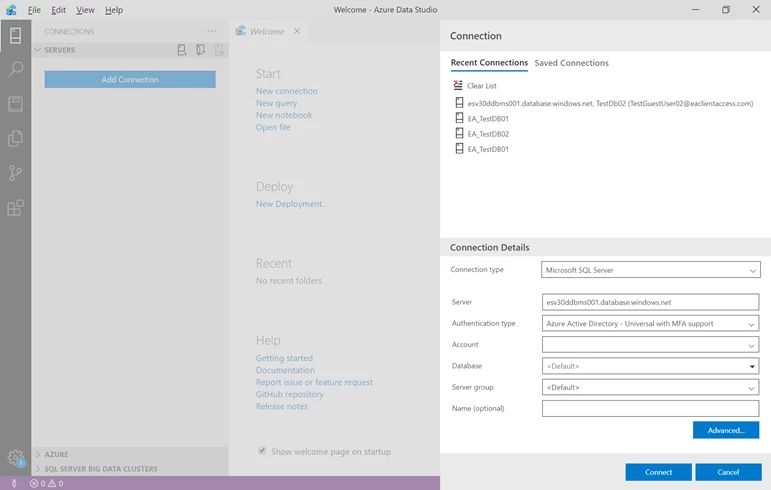
When you reach the Connection Details > Account field, select Add Account from the dropdown list.
Enter your Microsoft account information and verify the login using the security code from your MS Authenticator.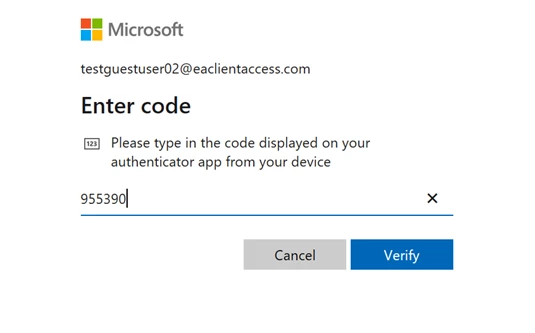
If your login was successful, you should see a message that Your account was added successfully!
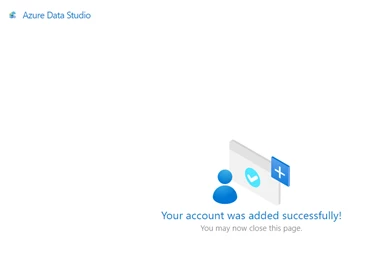
You should then be able to select your email address in the Account field.
Continue adding the details for the connection, including:
-
Azure AD Tenant: EveryAction
-
Database: Use the database name that was in the Invitation email you received when setting up your user account. This is required.
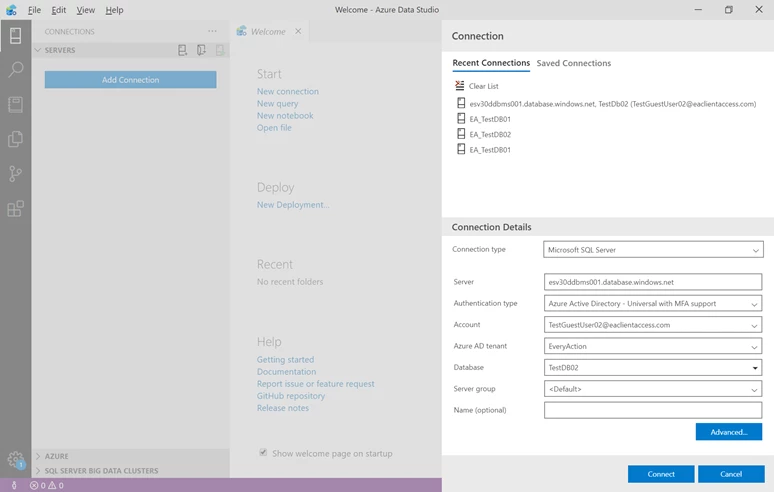
Select Connect to login. If the connection is successful, you should see the connection as an option in your Servers list.
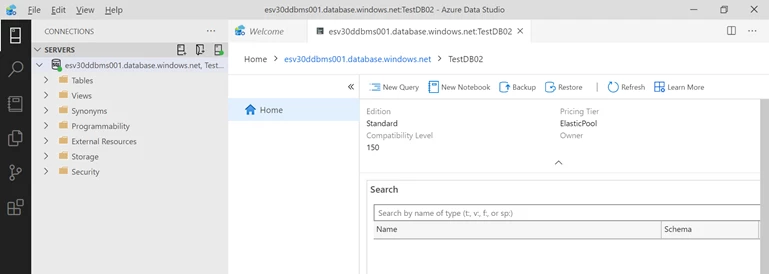
To start querying, select the New Query link.
Connecting by command line
If you already have SQLCMD, installed, verify that you have version 15.02 or higher.
You can use the following code in SQLCMD (Windows only) to log in using the command line. Be sure to substitute your own email and database settings where appropriate.
Example login using Azure Active Directory Authentication with MFA
Sqlcmd -S esv30ddbms001.database.windows.net -d TestDb02 -G -U dora.dogood@testusers.com -q "select top 10 VanID from dbo.Contacts;"
Explanation of commands:
-
-S is for the server name
-
-d is for the database name
-
-U is for user name
-
-G without a password enables the interactive authentication process
-
-q is the query
Alternate search terms: Pipeline, Cloud, Azure, SQL, Connect, MFA, SSMS, SQL Server Management Studio, Data Studio, Authenticator