

(4 min read)
Disbursements help you track your expenditures in the system, making it easier to file your compliance or disclosure reports and track your spending for your campaigns or events. It is available in all Designations that are set up for Disclosure Reporting and may be available to other organizations depending on their particular package and permissions.
Before you begin
You should first make sure you’ve added anyone to your database that you are making payments to. Businesses should be entered as an Organization type contact to make sure they appear in the right place in your reports. If you need to change the type of contact, you can do so from the Vital Stats section of the contact record.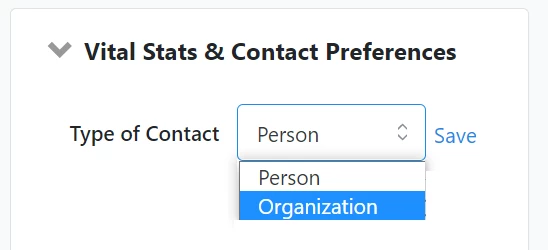
Adding to contact records
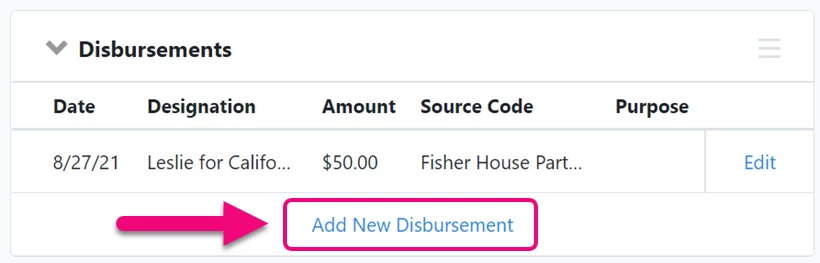
You can add a disbursement directly to a contact record by opening the Disbursements section on the contact’s details page and selecting Add New Disbursement.
Fill in the details for this disbursement. The required fields are noted with a red asterisk. 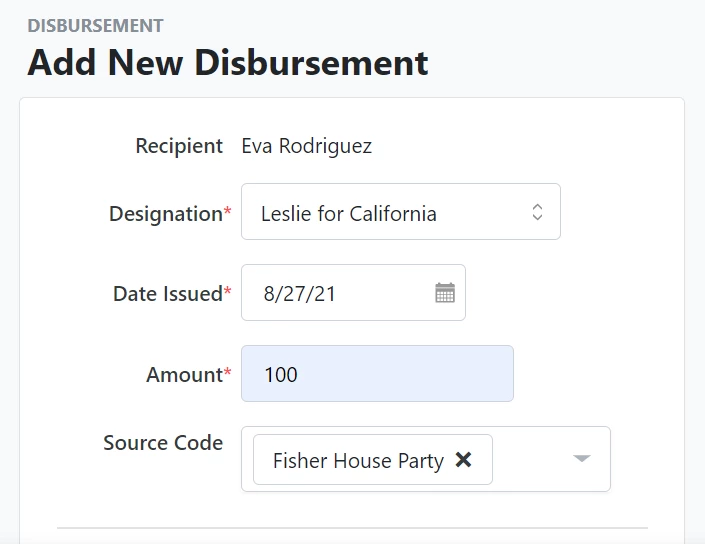
If your organization is required to file disclosure or compliance reports, you will also see a Disclosure section that you can use to make sure you are adding the information you need to file your reports. What you see here will depend on your committee’s setup and on the reports you will file through the Disclosure Center.
Select which Period and Cycle you made the disbursement in, and then select the Disbursement Type that matches your use.
Read more about setting up Disbursement limits
The other fields you will see depend on the type you selected. Be sure to include information for any other fields flagged as Reported. These are required fields that will be included in your Disclosure Reports. Once you’ve entered the required data, the yellow flag will turn green with a checkmark.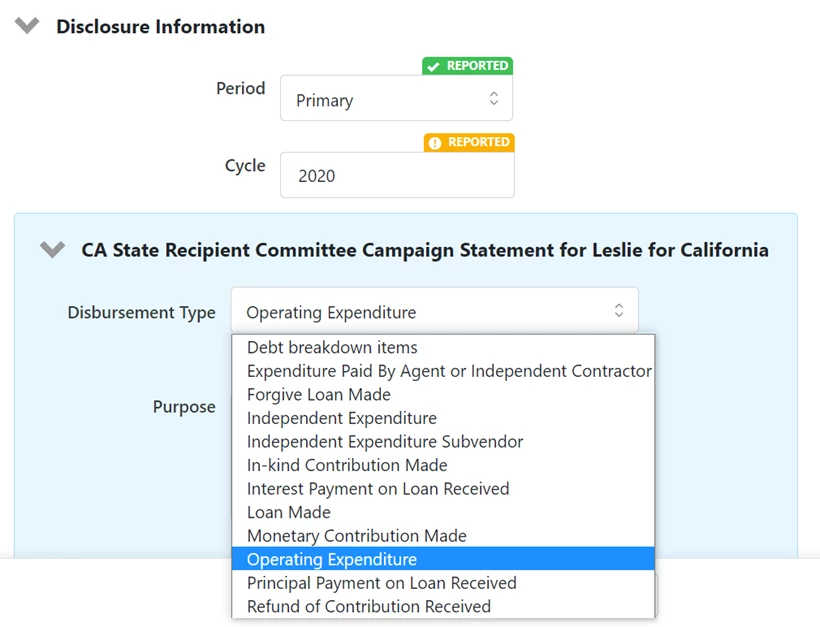
For help with choosing the correct type, you should refer to your jurisdiction’s disclosure rules. You can also download our specific instructions for the type of State or Federal reports you are filing:
Read more about filing State reports
Read more about filing Federal reports
If there are additional fields you want to include, you can use the Advanced Reporting Options to Override defaults and use my changes below. You can then select Show All Fields to include the required fields you will want for your filing (based on your particular state or federal compliance setting). Consult your State or Federal filing instructions for more help on which fields you need to include.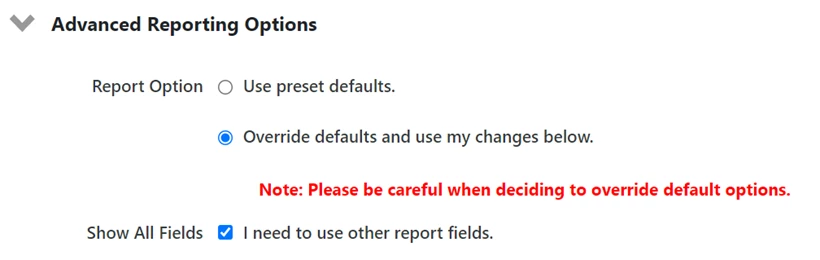
Once you’ve finished adding the details, be sure to Save your entry.
Bulk Uploading
You can add many different disbursement types and amounts at once to your database using Bulk Upload. You cannot upload contributions and disbursements from the same file, so you’ll have to prepare a separate upload just for disbursements.
It’s a good idea to prepare your upload file by looking at the output from one of your Disbursement Reports as a model, to make sure you are including the same columns you see in the report. To see a sample, run a Disbursement Report (you may want to filter it to only one or two records for this sample) and then export it and open it using Excel, Google Sheets, or another spreadsheet program.
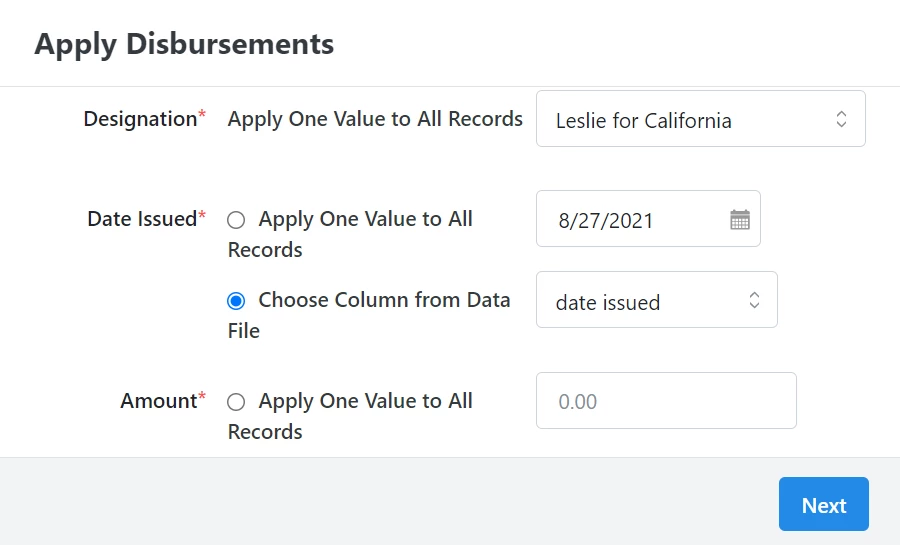
After you’ve prepared your file, you can then add it using the Bulk Upload Wizard. Use Apply Disbursements to map the columns in your file.
Bulk Applying
Bulk Apply can be helpful if you have several people who received the same disbursement type and amount, such as when reimbursing set expenses for materials or events. You should NOT use this method to refund contributions, however.
Read more on refunding contributions in NGP
Read more on refunding contributions in EveryAction
To Bulk Apply disbursement information to multiple records, Create a List and then select the Bulk Apply option from My List. Use the Apply Disbursements mapping to add the values you need to those records.
Read more about Bulk Upload and Bulk Apply

Linking to Ticketed Events
To manually link a Ticketed Event to disbursement, search for the Event List in the Sidebar. (Disbursements are not available on other kinds of events.)
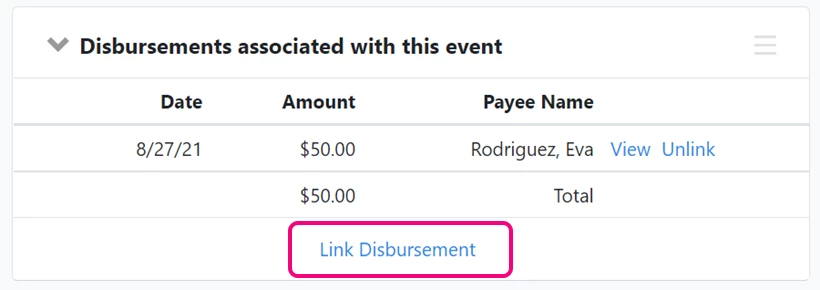
Click the name of the event to open the details page and then open the section for Disbursements associated with this event. Select Link Disbursement and search on the contact name for the disbursement name you wish to add.
Ticketed Events can also be linked by using the same Source Code as your disbursement. Once the Source Code is applied to your event, you should see it appear as part of your disbursement record.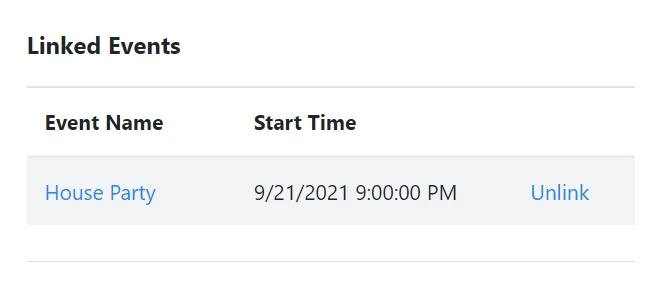
If you later need to change the Source Code on your event or disbursement, you should review your links. You may manually need to Unlink disbursements that were assigned to the previous Source Code and manually Link the ones that match your event. This can sometimes trip you up when filing Disclosure Reports, so please review your links before filing your reports.
Read more on managing events for compliance
Editing disbursements
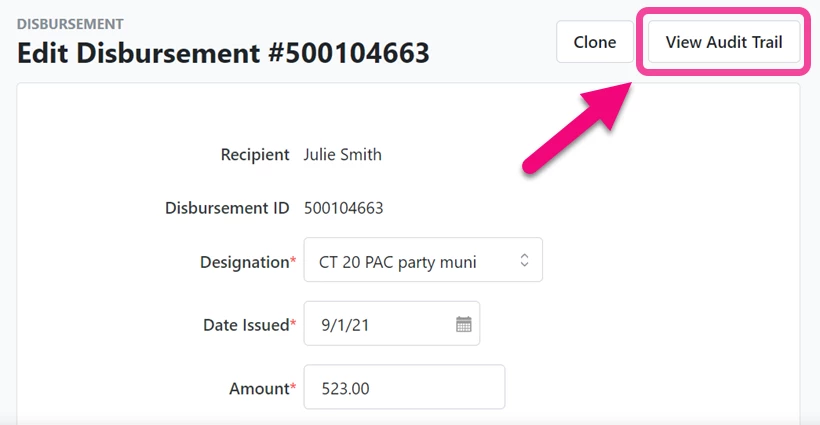
Disbursements are never locked by the system (after reporting or as part of a Financial Batch), so you can edit them at any time from the details page for that Disbursement. If you need to see edits that were made to your disbursements, you can run a Disbursement Report and add the Date Last Modified column to see if any changes were made since your last report.
Read more about disbursement reports
You can click on the Disbursement Amount in the report results to open the details page and then View Audit Trail to see what changes were made.
Bulk deleting disbursements
To delete disbursements, navigate the Disbursement Report and apply your desired filters.
Once the Disbursement Report contains only contributions you wish to delete, select Report Actions, and then select Bulk Edit from the dropdown menu.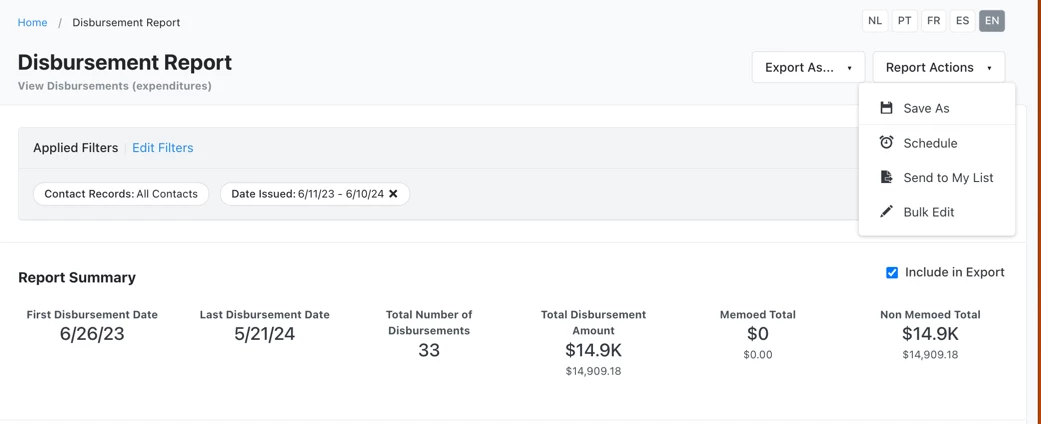
You’ll see a pop-up window encouraging you to review your report before proceeding. Once you’ve thoroughly reviewed your report, select Continue to Bulk Edit.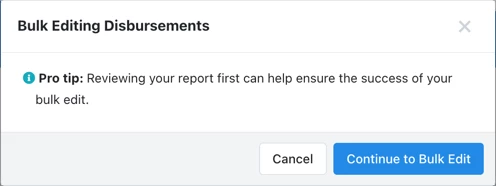
On the next page, select Select a bulk action and then select Delete Disbursements from the dropdown menu.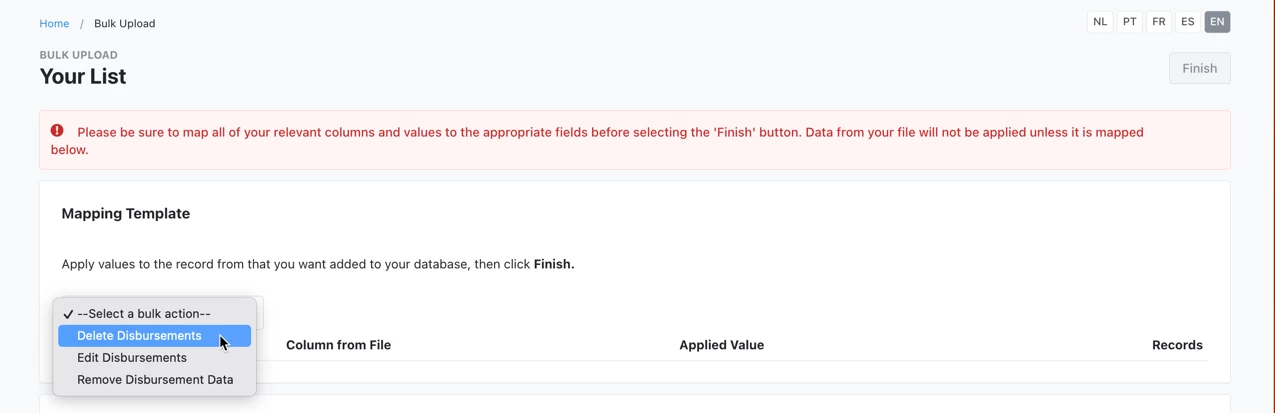
Select Finish.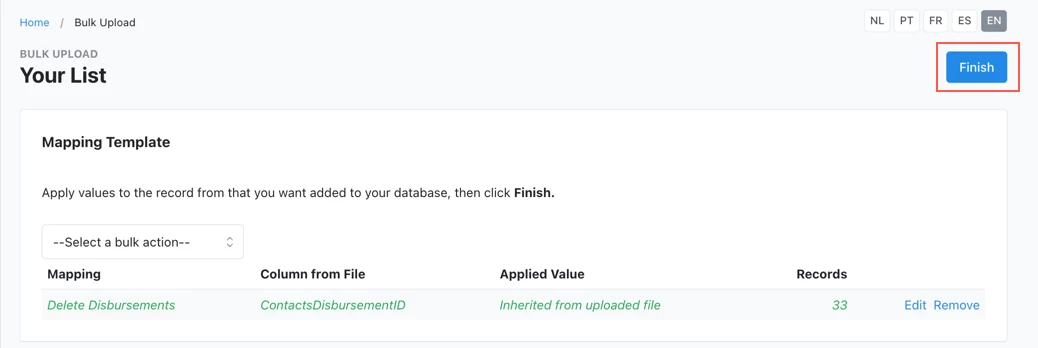
You will see a final warning message asking you to type the word “DELETE.” After typing “DELETE,” select Delete Disbursements to delete the disbursements.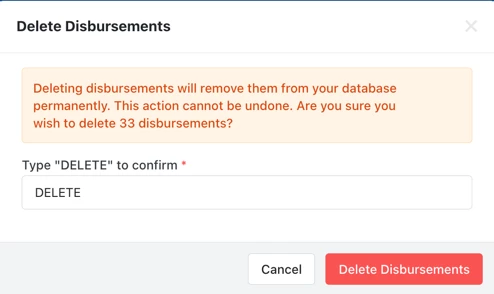
You will be automatically redirected to the Bulk Upload Batches page, where you can track the progress of your bulk deletion.
Read more about bulk deleting disbursements and contributions