

(7 min read)
Targeted Email is a powerful feature that allows you to segment your audience for better deliverability, create dynamic content using merge fields, maintain a consistent look and feel, and encourage more conversions and engagement.
Getting started
When you are ready to begin creating a new email message to your subscribers, you can open Targeted Email from the Sidebar.
You can then select:
- Create New to begin a new email
- Create from Existing to select a previous email to copy. You can then decide whether you want to include the same audience and then add or edit information as you would when you Create New.
- Create Series with Automation to create a series of scheduled emails you can send to supporters
- Create an Email Group to send multiple versions of an email without sending duplicates to supporters
If you want to create a new single version email, select Create New.
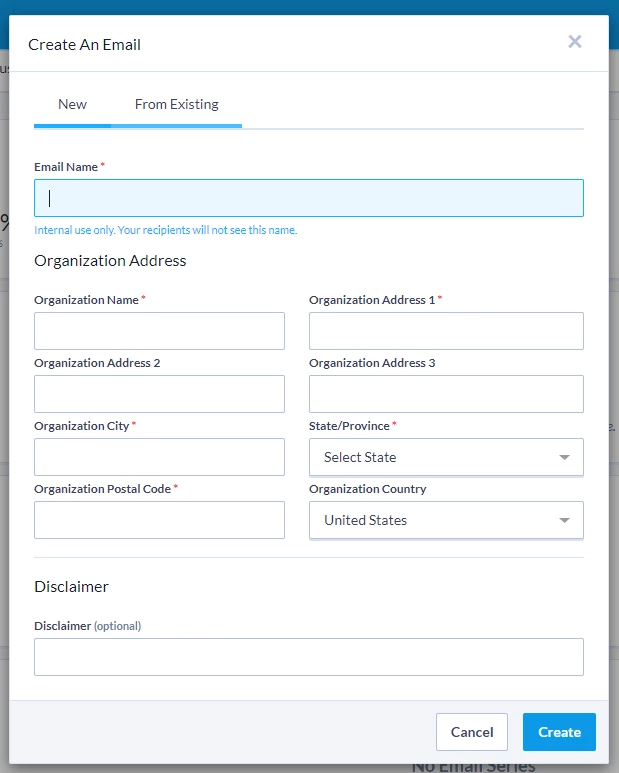
Adding organization sender information
You will be prompted to provide a name for your new email message. This email name will only be seen internally; it will not be used for the subject line.
If this is the first time you are sending an email, you will need to enter your Organization Address. This will add your information to the Organization Merge Field, which is included by default in your email content. You will be notified in the last step, Review & Deliver Message, if the Organization Address merge field is missing. Having a legitimate physical address visible to your recipients helps with deliverability and complies with our Acceptable Use Policy.
Read more about updating Organization Address and Disclaimer merge fields in Targeted Email
Choosing your editor
You will also be asked to select which editor you’d like to use to compose your email. While we highly recommend the Drag & Drop editor to more easily create polished, mobile-responsive layouts, you can also select the Classic editor if you need specific control over part of your message formatting.
The Drag & Drop editor makes it faster and easier to:
-
Create mobile-responsive layouts using customizable templates and drag & drop elements
-
Add video content links and social media links
-
Quickly swap out graphic elements and immediately view the new layout
Read more about using the Drag & Drop editor to create Targeted Email
The Classic editor allows you to:
-
Access HTML source code directly
-
Apply customized HTML and CSS styling
-
Employ Themes to quickly standardize the look for your emails
-
Create and include Reusables
Read more about using the Classic editor to compose Targeted Emails
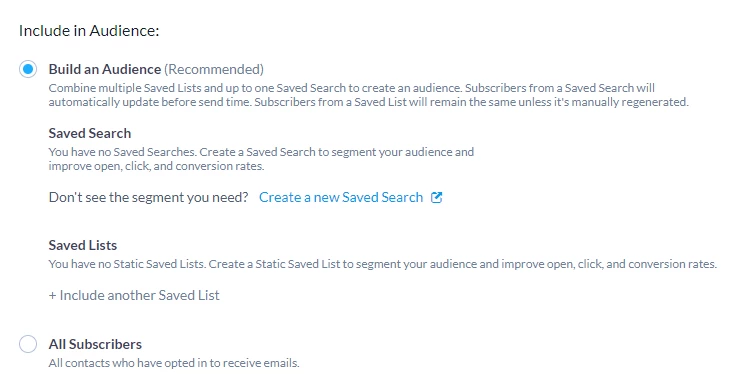
Selecting recipients
Once you've finished selecting the basic settings for your email, you will then be asked to select an audience. You can Include > All Subscribers or you can Build an Audience by including contacts using Saved Searches, Saved Lists, or Create a new Saved Search.
When you select Create a new Saved Search, a pop-up window will open that will allow you to Create a List as you normally would.
Read more about creating a list
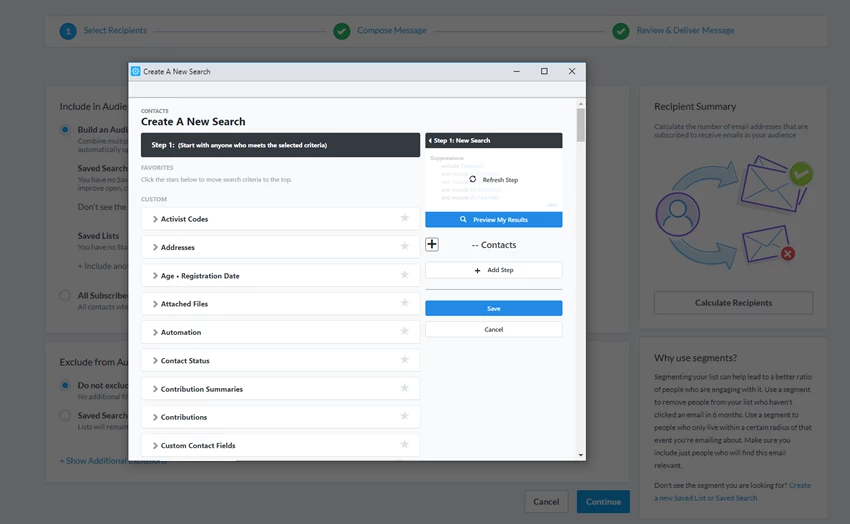
Once you have saved your search, you'll be returned to the Select Recipients step. You can further refine your audience by selecting contacts you wish to Exclude from your mailing by:
-
adding other Saved Searches or Lists
-
Creating a new Saved Search for exclusion
-
excluding low performing email addresses based on scores
-
excluding low performing emails based on an email score threshold for specific domains
-
excluding certain types of emails
-
removing email addresses already in other workflows or series
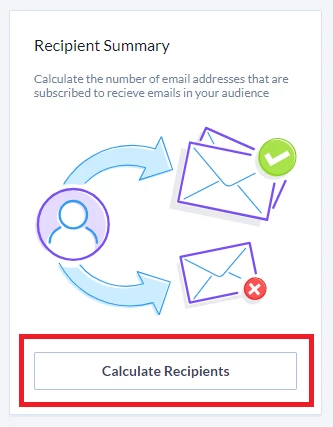
Calculating recipients
After building your audience, calculate your recipients in order to verify that the counts are as expected.
The recipient count is the number of subscribed email addresses. This count often is different from the number of contact records in a Saved Search or Saved List since each contact in your search may have one or more subscribed email addresses or they may not be subscribed to receive your messages at all.

Recipient Summary categories include:
-
Active: The number of Subscribed email addresses in your audience that we will attempt to email.
-
Opted Out: The number of email addresses in your segment that have Unsubscribed and we will not email. A supporter may unsubscribe after receiving an email, following the Unsubscribe link provided the email footer, or via a Self-Service Portal.
-
Duplicates: The number of email addresses that appear more than once in your segment. We will only send 1 email to that email address. The contact record with the most recently added email address will be the contact record selected.
-
Excludes: The number of contacts excluded from your email based on your exclusions. This count does not include email addresses that appear on our global deny list.
-
Bounced: The number of email addresses in your segment that have recorded a hard bounce. The status of hard bounce emails updates to Unsubscribed, so there is often overlap between the Bounce count and the Opted Out count. Hard bounces almost always result from an invalid email address.
Improving deliverability
From the Compose Message step, you can add basic deliverability information before you create your message.
Begin by adding:
-
From Name
-
From Email Address
-
Reply-to Email Address
-
Email Subject
These must all follow our deliverability guidelines and best practices in order for your email to be sent.
Read more in the Email Deliverability Success Guide
You should also include a preheader with your message.
Preheader text appears when a recipient is previewing the email in their mail program before opening it fully. Boost your open rate by adding a compelling reason for them to read your message.
Composing your message
Once you’ve set up the basic deliverability information, you can then begin to compose the body of your email message. The interface you see will depend on which editor you selected when you first created your email. In most cases, you will probably want to use the Drag & Drop editor to create your emails.
Read more on using the Drag & Drop Editor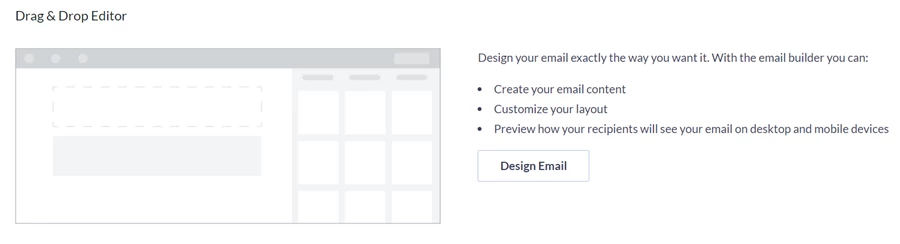
If you need to access the HTML code directly to create more complex emails, you can instead choose the Classic editor which will give you a WYSIWYG interface that will also allow you to directly edit the HTML source code.
Read more on creating emails using the Classic Editor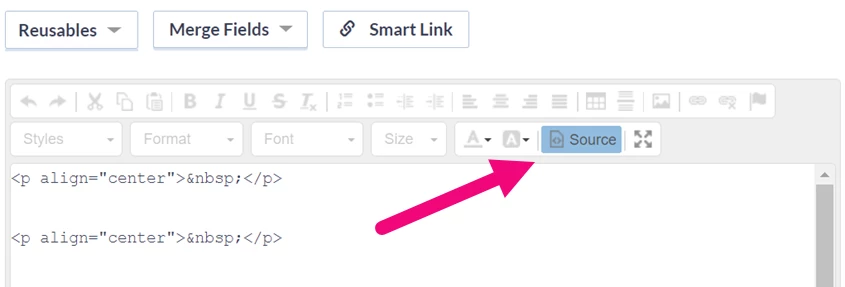
Once you are finished creating your formatted email with either the Drag and Drop editor or the Classic editor, you can then Generate Plain Text Message to accommodate email programs that cannot handle advanced graphical styling. You can then make any needed edits to your Plain Text to make sure it will display the way you want.

When you send your email, both versions get sent. Most people will see your HTML version. The plain text version improves deliverability and ensures that anyone using a device that does not support HTML will still see your message.
Read more best practices for crafting great content
Please note: Sent emails do not include an option for recipients to view an email as a webpage. Historically, this was a useful feature for email, but email providers today are better at rendering HTML on both desktop and mobile apps. In addition, our Drag & Drop editor uses styling that works in any email provider.
Required merge fields
Merge fields dynamically pull in information from a contact record and place it in your emails or forms. For example, using Merge Fields > Contact Details > First Name, you can automatically include the correct first name for your supporter. Adding merge fields is a great way to personalize email content and significantly increase conversion rates. These fields can be used in both the HTML and Plain Text versions of your mail message.
Read more about personalizing your emails with merge fields
You can add merge fields in the Classic editor by using the dropdown menus above the editor.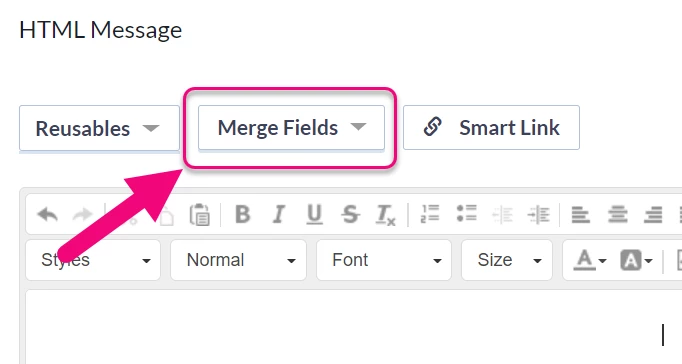
In the Drag and Drop Editor, merge fields are available in any text section under More > Merge Fields.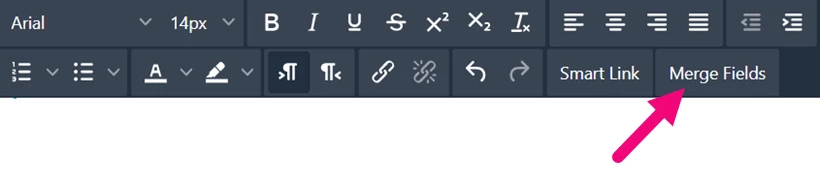
The following merge fields are required to be somewhere in your messages in order to send an email:
- {{Disclaimer}}
- {{OrganizationAddress}}
- {{UnsubscribeLink}}
You'll notice that these appear by default, along with some sample disclaimer text.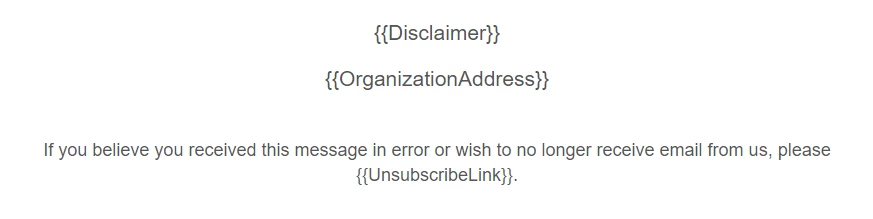
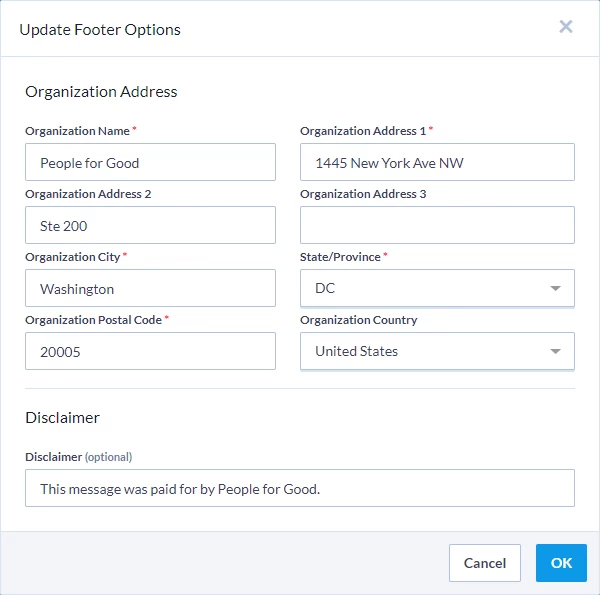
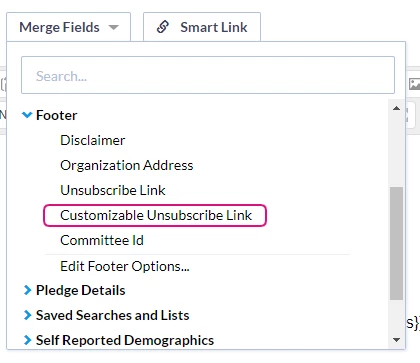
To change the content of the Disclaimer and Organization Address merge fields, open Merge Fields > Footer > Edit Footer Options...
Adding more personalization with conditional content
Conditional content helps you create even more powerful personalization in your messages. Using conditional statements built on pre-existing macros (like if equals, elseif equals, and so on), you can pull data from your contact records using merge fand then make comparisons to display specific information depending on the results. A simple example would be:
From People for Good{{ if equals(StateOrProvince,'NH') }} New Hampshire Chapter
{{ elseif equals(StateOrProvince,'FL' }} Florida Chapter
{{ else }} National Organization {{ end }}
This example will give the correct chapter name depending on your recipient’s home address.
Read more about conditional content
Increasing engagement with Smart Links
You can also add Smart Links to your email message. Smart Links make it easier for your recipients to donate or take action instantly by inserting a link to your online form that will automatically pre-fill using the supporter’s personal information from their FastAction profile.
Smart Links are also used to create personalized content or asks based on your supporter's previous actions. For example, you can add a Smart Link to your email that will dynamically suggest donation amounts based on your donor's previous contributions.
Read more on using Smart Links in the Classic editor
Read more on using Smart Links in the Drag & Drop editor
Tracking your results with query strings
Query strings help you track responses to your email. The query string builder will help you automatically apply source codes, Market Source Codes, or other codes to the links in your message.
Read more on using query strings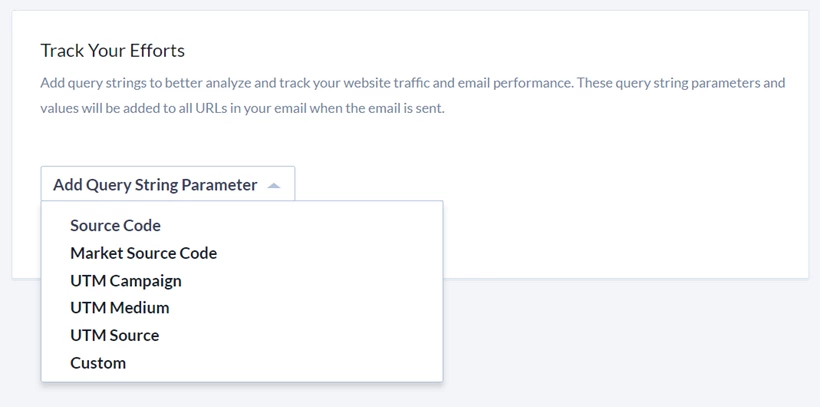
Reviewing and Delivering your message
The last step before scheduling or sending your email will help you review and correct any potential errors that will impact deliverability or that violate our Terms of Service.
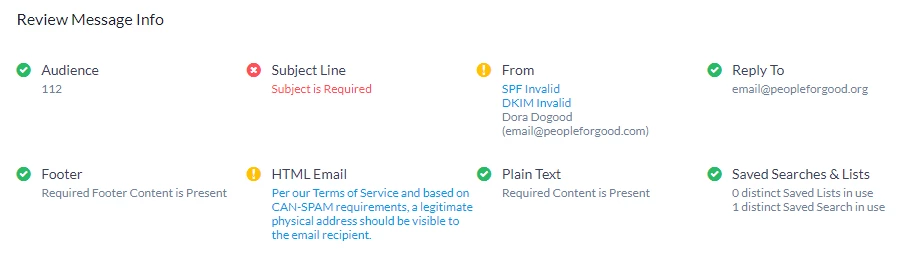
If you have not yet set up your email sending domain, you will see an error. Your administrator will need to set up and register your domain with us in order for you to send from our system.
Read more about setting up your email sending domain
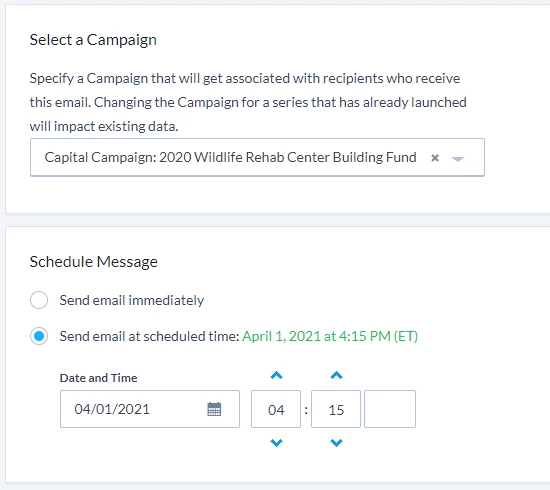
Once you've corrected any errors from the previous steps, you can then select a campaign to associate with the email. Once you've applied a campaign to your outreach efforts, you will be able to search and segment on it later to find out how successful your efforts were and who might respond to your next outreach or fundraising effort.
You can then select whether you wish to send it immediately or schedule it for a specific day and time.
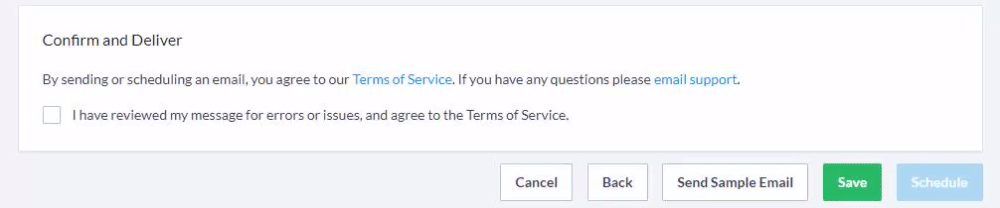
Finally, you must read and agree to the Terms of Service before you can send the email.
Once your email is sent, you will find it listed with other recently sent emails in the Sent section on the main Targeted Email dashboard or in the Sent section of the Emails tab.