(7 min read)
Attention: EveryAction is now Bonterra CRM. Please bear with us as we update our screenshots to match our new name.
Send contribution acknowledgments or other personalized form letters to your supporters by using a Mail Merge Template.
By adding these templates, you can skip the extra steps of exporting your list and creating the merge file in your word processor. You'll be able to assign a template to use with each contribution and export your most commonly needed letters to a merged mail file directly from your contact or contribution records and reports.
Getting started
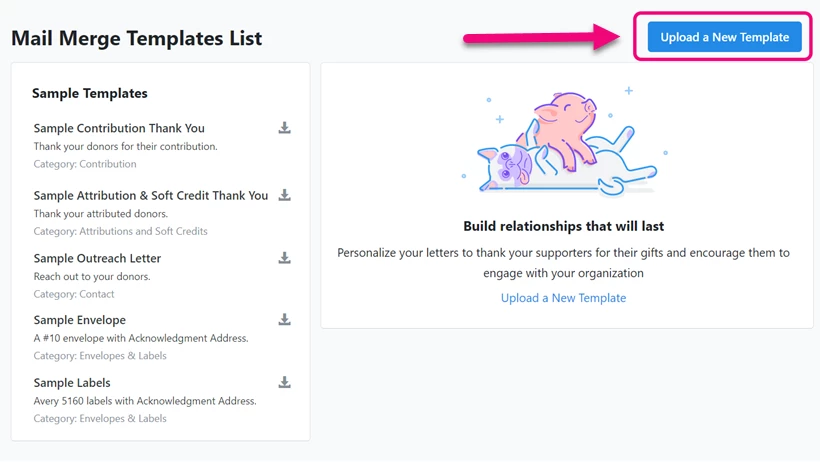
Begin by opening Mail Merge Templates from Main Menu > Administrative Menu.
You'll see an option to Upload a New Template as well as several Sample Templates you can download and edit to meet your needs. If you have previously created templates, you'll also see a list of them on this page.

Creating your template
To help you understand how to create or modify your templates to work with our system, download one of the samples and open it with your word processor. MS Word works best for creating or editing these templates.

Instructions for editing the template appear as Comments in the downloaded sample. You can change any of the body text to meet your needs.
At the bottom of the document, there is a list of commonly used fields you can add to your document body. This makes it easy for you to copy and paste any of the unique formatted fields into the document.
You are not limited to this list of merge fields, however. You can add any of the columns in the Contribution Acknowledgment Report or Contact Records Report as a merge field. To do this, follow the instructions below for creating a custom mail merge template.
Once you've updated your text, you should delete any items that you don't want to be seen in your letters, including the header (in red) and the table of field names. You will also need to delete or hide the Comments by changing the document Review settings to No Markup.
The last step after changing the content and adding the merge fields is to check the formatting of the document. Make sure it prints properly using your letterhead or paper choice. Make at least one test printing of the document before saving and uploading the template.
Save your document with a .docx extension.
Creating a custom mail merge template
You can also create a mail merge template from scratch if none of our samples meet your needs.
To begin, you should create a Contribution Acknowledgment Report or Attributions and Soft Credits Report with the columns you need or adjust the Contact Records Report from My List to include columns you want to use as a merge field in your document. Save this custom report as a Report Template and then Export the report to use for creating your document.
Open a blank document in MS Word and go to Mailings > Start Mail Merge. Select the type of document you wish to create (Letters, Envelopes, Labels, etc).
Then open Select Recipients > Use an Existing List. Select the report export file you created previously.
Create the content for your document as you normally would and use the Insert Merge Field option to include the merge fields from your saved report.
Once you've finished creating your document, select Start Mail Merge > Normal Document to create the final version of the template.
This is the most important step! If not selected, the merge document will not be produced in the Generate Letters step.
Save your document with a .docx extension.
Uploading your template
Once your template is ready you can upload it using Upload a New Template on the Mail Merge Templates page.
You will be asked to provide a unique name for your template. All templates are available only to the current committee they are being added to.

You will also be asked for a Category. The category determines where the template can be used in your records. Expand Which category should I use? to see tips on how to select the correct category.
- Contribution templates can be used from the Contribution Acknowledgement Report or contribution details page
- Attributions and Soft Credit templates can be used from the Attributions and Soft Credits Report or contribution details page
- Contact templates can be used from My List or from the Contact Overview for an individual record
- Envelopes & Labels can be used with either the Contribution Acknowledgement Report or with My List
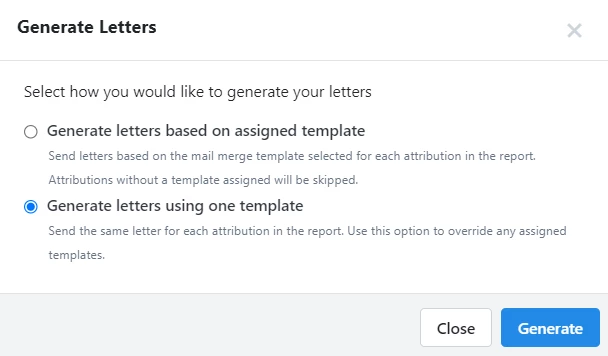
When you choose the Contribution or Attributions and Soft Credits category, you will then be able to select any other actions you’d like to happen when you Generate letters based on an assigned template. If you later override these settings by using Generate letters using one template from your list or report, the follow-up actions you choose here will be ignored and you’ll have the opportunity to choose the additional actions you want to happen at that time.
If you select the Attributions and Soft Credits category, you will also be asked to select which type of attribution to associate with the template. What you see here will depend on your package and permissions.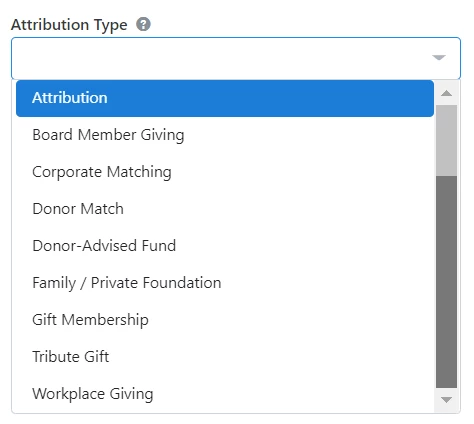
Once you’ve selected the attribution type, your template will be set as the default template for any attributions of that type. You are not required to have an assigned template for each attribution type and you can always change the template associated with an individual attribution by choosing another one from the details page for that particular contribution.
You can then Save & Attach the file you want to use as your template.
Read more about generating letters using Mail Merge
Using templates with source codes
You can associate your template with a particular Source Code. Contributions created using that source code will then automatically be associated with the right acknowledgment template when you create your list or acknowledgment report.
You may still have a few instances where you will need to apply acknowledgment templates manually, however:
- If you are applying your source code to a Recurring Commitment, only the first contribution will have the template assigned. It will not be automatically applied to subsequent payments.
- If you later change the source code on a contribution, you will need to update the assigned template directly on the contribution record.
Read more about creating source codes
Assigning templates to contributions
When entering a contribution, you can select which of the acknowledgment templates to use for the thank you letter. This makes it easier to print Thank Yous from your reports or contact records without needing to run a report and update settings for each template you want to merge.
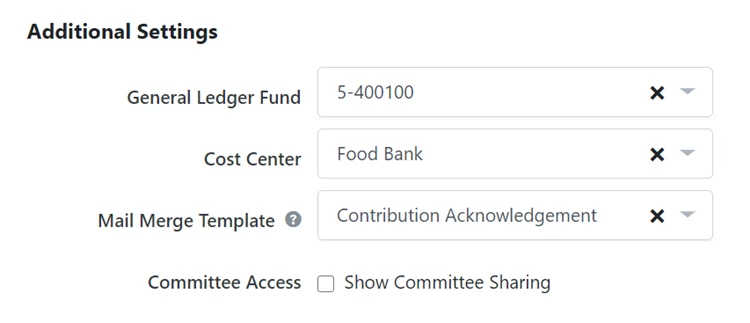
From an individual contribution record, you can select the Mail Merge Template from the Payment Details > Acknowledgments & Premiums section.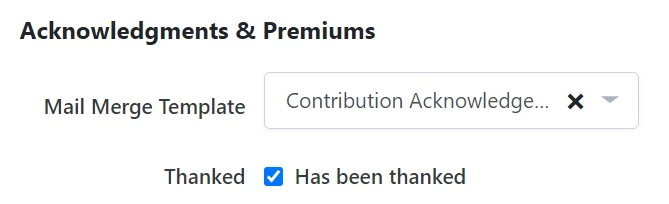
Any attributed contacts will automatically be assigned with the template that matches that attribution type, if available. You can later edit the template assigned to the attributed contact using the action menu dropdown to choose another letter template.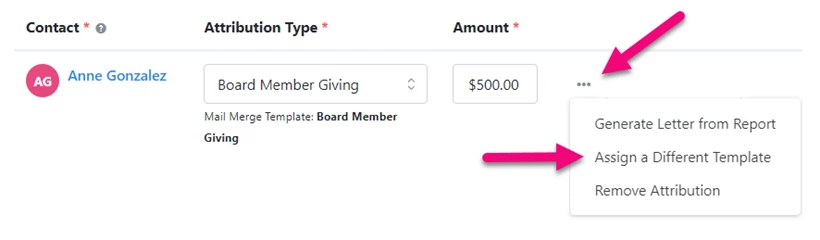
Assigning templates on batch entry
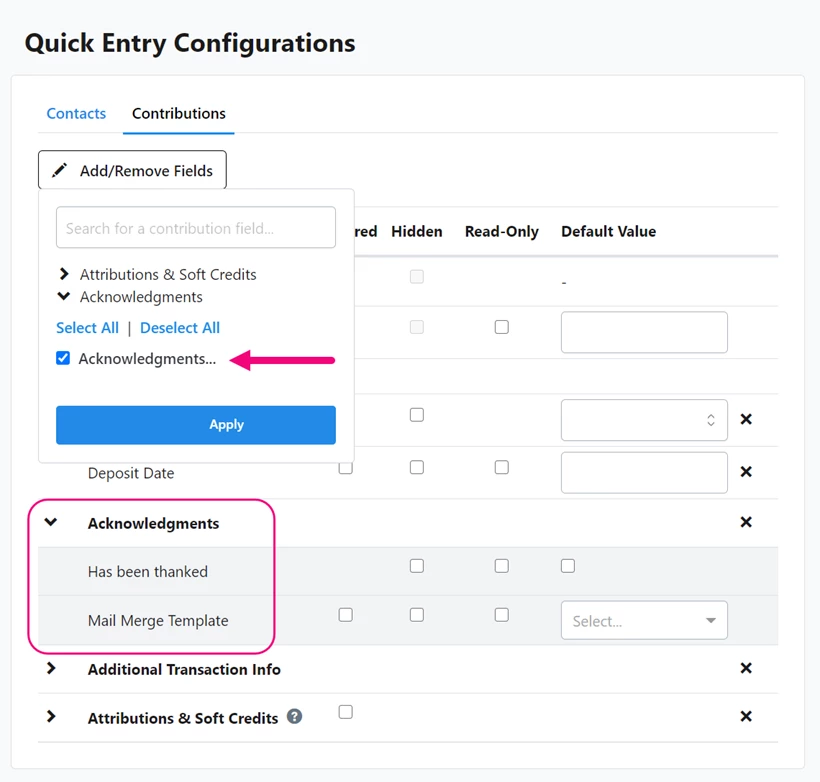
If you use Batch Gift Entry to enter contributions, you can update your Financial Batch Manager >Quick Entry Configurations to include the Contributions > Acknowledgements field group which will add the Mail Merge Template and Has been thanked options to your entry form. This will give you an option to choose which Mail Merge Template to use with the contributions you are entering for each batch.
If you choose to set a default value for the template here, it will override any template that is associated with a source code.
Read more about configuring Financial Batch Gift Entry
If you are adding an attribution to the contribution, the default template assigned to that attribution type will automatically be added to the contribution record. You can later go back and change the assigned attribution template from the contribution details page.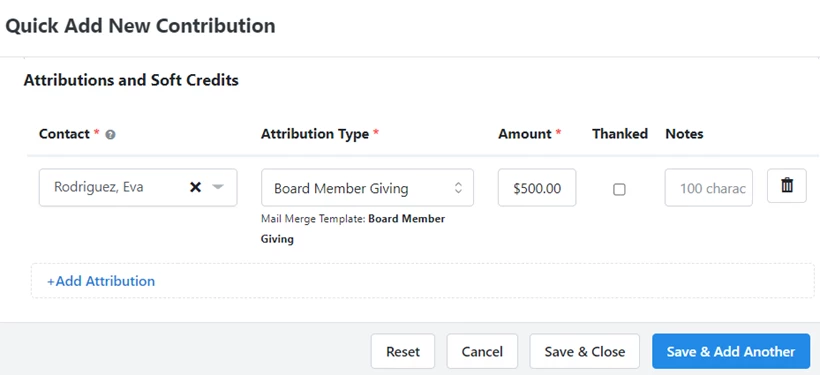
Assigning templates using Bulk Upload and Bulk Apply
You can also add Mail Merge Templates using the Bulk Edit/Bulk Apply option in My List and your reports or add them whenever when you Bulk Upload a file by mapping Apply Contributions > Mail Merge Template.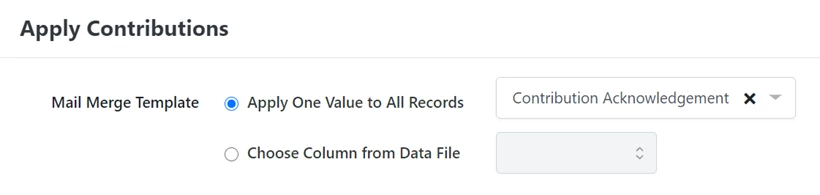
Read more about Bulk Upload
Read more about bulk editing contributions
Changing the templates when creating your mail merge
Setting up each template with default actions will save you several steps and make it easy to create the right thank you for each contact using only one list or report.
However, you can always override the template you assigned to either your contributions or attributions by using the option to Generate letters using one template when you are ready to create your mail merge file. The follow-up actions you chose when you uploaded your template will be ignored and you’ll have the opportunity to choose the additional actions you want to happen at that time.