

Enable and customize non-US currency acceptance through Stripe and form settings.
Step 1: Enable the Feature
- Contact Bonterra Support and request that International Payments be enabled for your organization.
- Ensure your Designation is connected to Stripe via Stripe Connect.
Step 2: Confirm Enablement on Your Form
-
In the Basics step of the form setup, select the connected Designation.
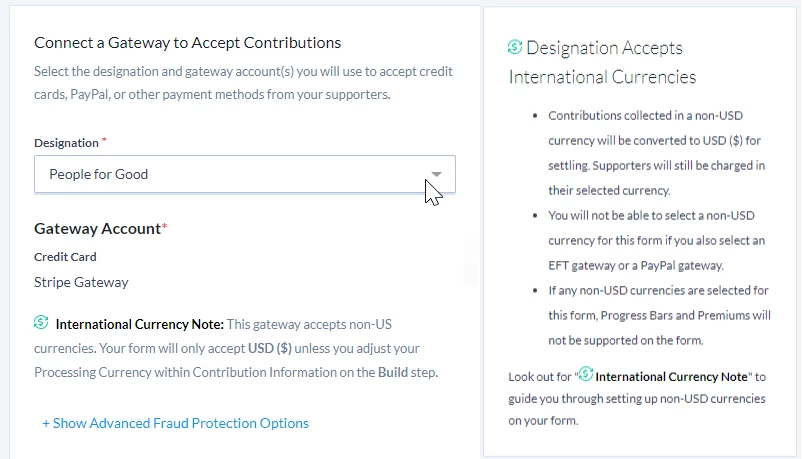
-
A notice appears confirming that your form can now accept non-US currencies.
Step 3: Configure Currency Options
- Go to the Build step.
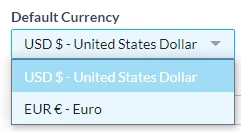
- Under Contribution Information, locate the Processing Currency section.
- Select one or more available currencies (CAD, EUR, GBP).

-
Set a Default Currency — this currency will appear first when supporters load the form.
To learn how to set up and manage International Payments, see the following help articles:
Not quite what you were searching for?
- Navigate back to the Accepting Donations in Non-US Currencies Resource Index.
How do I enable and configure international payments on a form? | How does enable and configure international payments on a form work in EveryAction? | Why can't I enable and configure international payments on a form? | Where do I enable and configure international payments on a form in EveryAction? | What is enable and configure international payments on a form in EveryAction? | How to enable and configure international payments on a form? | Can I enable and configure international payments on a form in EveryAction?