

The Bulk Upload Relationships tool allows you to efficiently create new relationships between contacts. Rather than manually creating individual relationships, you can upload a file with your contacts’ relationships to add to the system.
Preparing your Relationships for Upload
Before bulk uploading relationships, make sure your file is in .csv or .xls format.
Please keep in mind the following as you start your bulk upload:
- You can only bulk upload relationships for contact records that already exist in the system.
- Two contacts may share only one relationship. For example: they cannot be both friends and coworkers.
- Relationships will be created for both the primary and secondary members in the file.
- The relationship between a secondary member and primary member will be the gender neutral version of the uploaded relationship. For example: a secondary member is listed as the primary member’s sister in the bulk uploaded file. The system will also create a relationship for the primary member as the sibling of the secondary member.
- Relationship types are specific to your committee, please ensure that you are using relationships that are available to your committee when uploading new relationships between contacts.
- You can create relationships between organizations and individuals, however the organization must always be listed in the first column of the file as the primary member.
Uploading New Relationships
To begin bulk uploading new relationships, follow these steps:
-
Click Run Bulk Uploads in the Load Data tile on the Main Menu page.
-
Click Upload a New File.
-
Select VANID or other External ID to upload your file from the Mode drop down menu.
-
Please note: your selection will refer to the ID for primary member of the relationship and must be listed in the first column of the file.
-
-
Click Next.
-
Click Select a File and choose the file to upload.
-
Click Upload.
Mapping New Relationships
After uploading your file, select how you want to map relationships by following these steps:
7. Select Apply Relationships from the Mapping Template drop down list.
8. Identify the column in your data file that contains the Secondary Member’s VANID or external ID.
a. Please note: if you are using an external ID in the Secondary Member’s column, you will need to identify the specific External ID type for that column by selecting the appropriate value from the Secondary Member External ID menu.
9. Map the Relationship between Primary and Secondary members in the file.
a. Choose Apply One Value to All Records and select that value from the menu if all records in the file have the same relationship.
b. Select the option to Choose Column from Data File if your file contains a column of relationship data.
10. Identify how you would like the system to handle any existing relationships between contact records using the Overwrite existing Relationship? menu.
11. Click Next.
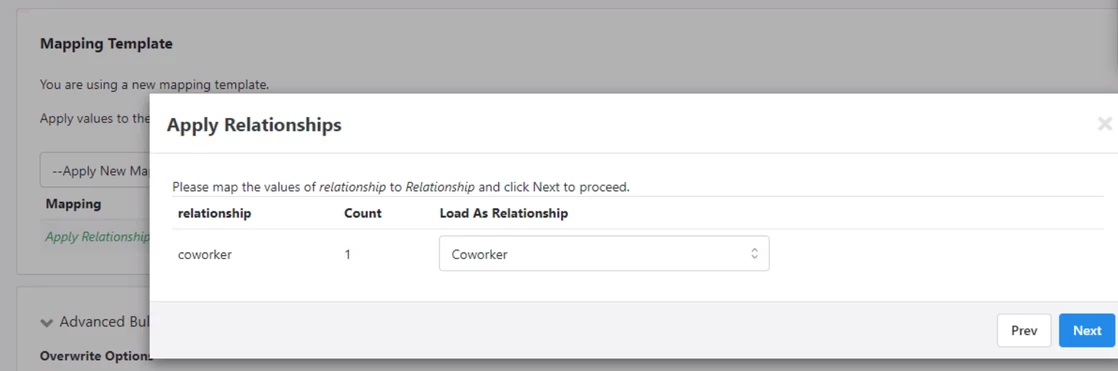
12. Map the relationship values in your file to existing relationship types in the system. Map the correct values for each using the Load as Relationship menu then click Next.
13. Click Finish in the top right corner.
14. Click Finish again in the pop up window.
How do I how to: use bulk upload to create relationships? | How does how to: use bulk upload to create relationships work in EveryAction? | Why can't I how to: use bulk upload to create relationships? | Where do I how to: use bulk upload to create relationships in EveryAction? | What is how to: use bulk upload to create relationships in EveryAction? | How to how to: use bulk upload to create relationships? | Can I how to: use bulk upload to create relationships in EveryAction?
