

How do I create and publish a grant?
Learn how Admins can create, customize, and publish grants in Bonterra's Deed Grants using the following simple, step-by-step process to build a clear, consistent, and accessible funding opportunity for applicants.
Step 1: Select the link to create a grant
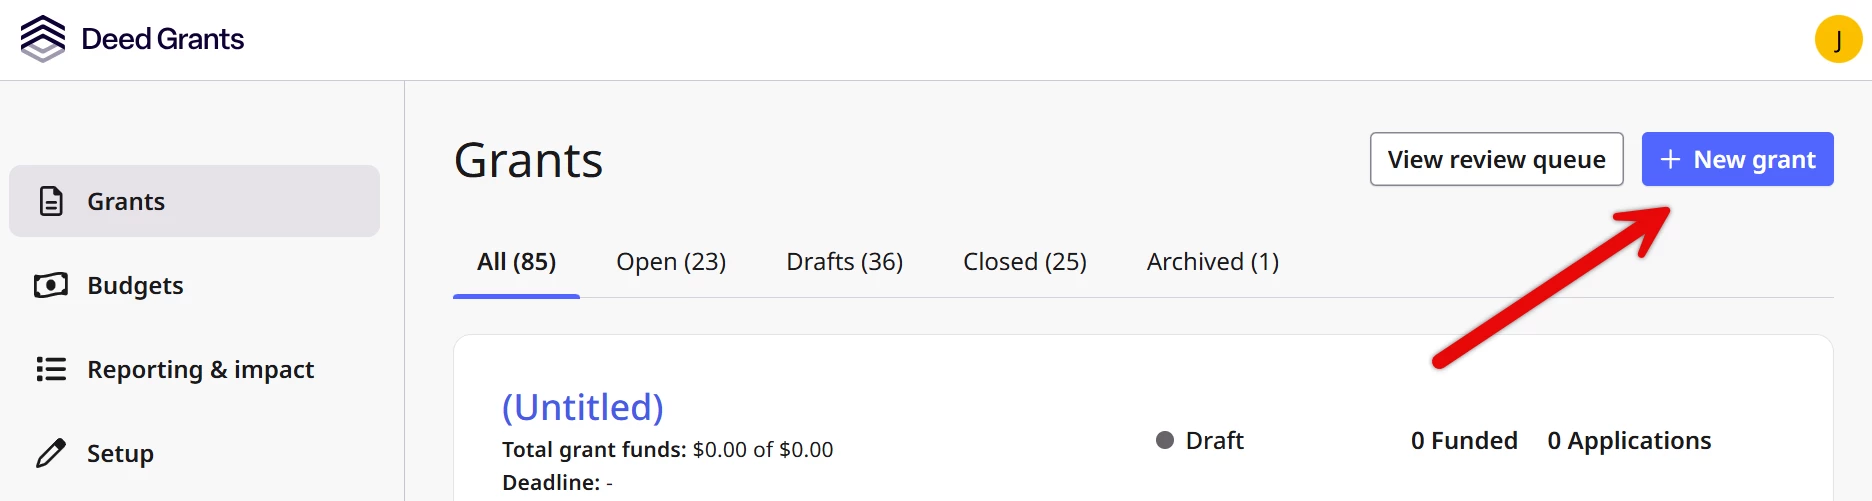
Enter Grants and select Create grant or +New grant in the top right corner of the screen to begin.
Step 2: Start from scratch or choose a template
Either Start from scratch or choose a recommended template and name the grant. Templates help ensure that each grant follows a consistent structure and includes the necessary application components.
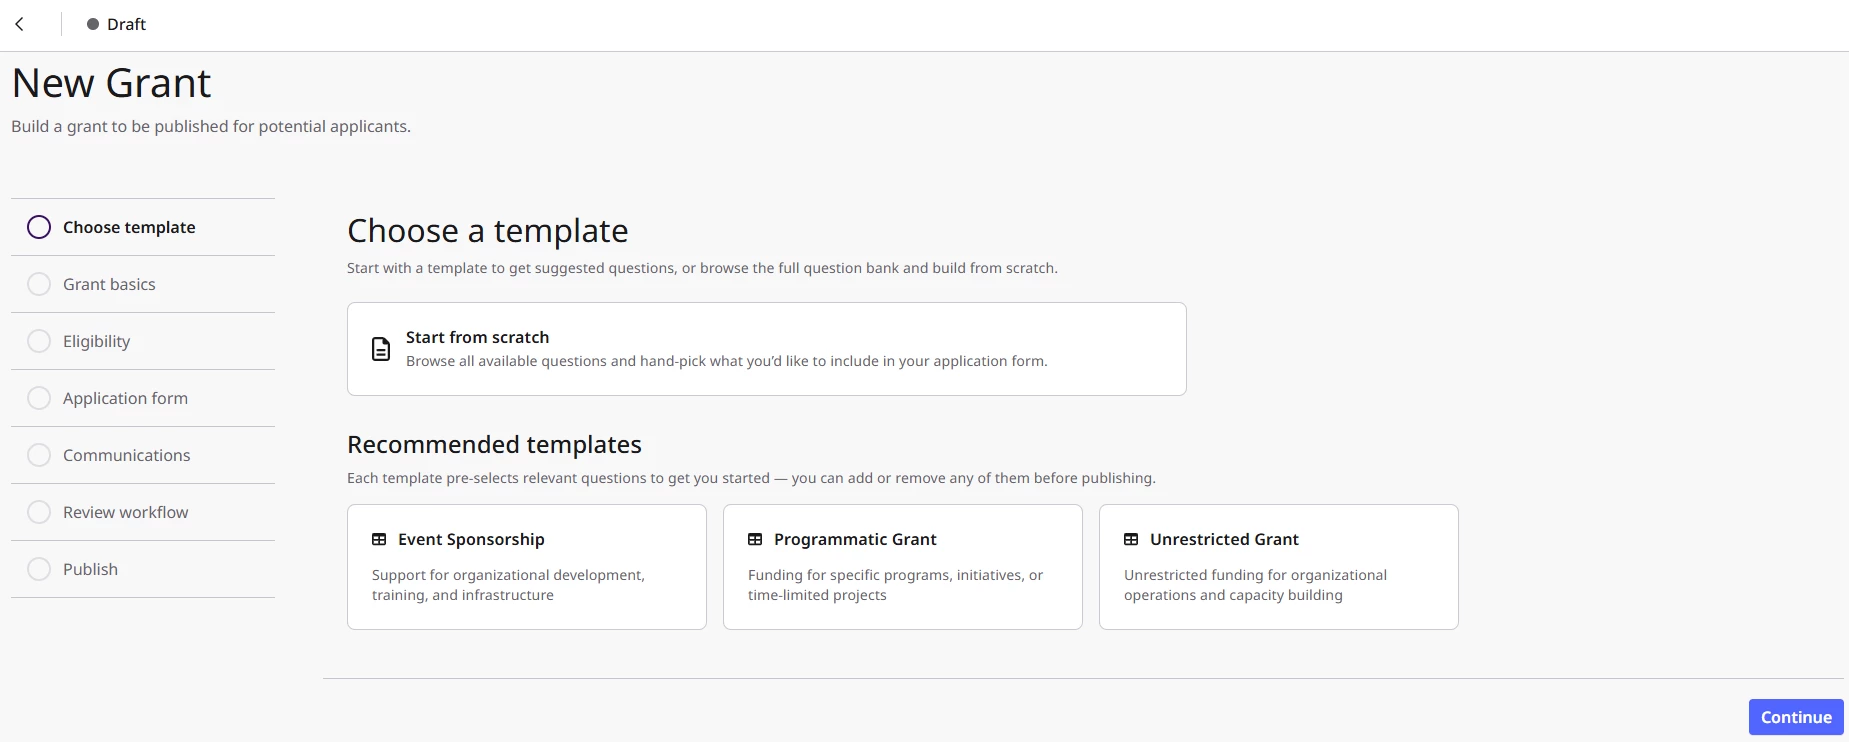
There are three standard templates to choose from:
- Event Sponsorship - Event Sponsorship offers financial support for non-promotional events, often in conjunction with industry memberships or charitable donations.
- Programmatic Grant - A Programmatic Grant provides funding to nonprofit organizations to support their programs that align with the Funder's philanthropic priorities.
- Unrestricted Grant - An Unrestricted Grant allocates funds to nonprofit organizations without specific usage constraints, allowing the recipient to apply the funds where they are most needed to advance their mission.
Make your selection and click Continue.
Step 3: Define grant details
Define the details that will determine the grant scope and structure. Follow along on the right side of the screen as you build out your grant to preview how it will appear to potential applicants.
Step 4: Establish eligibility criteria
Eligibility criteria can be set for location, cause area, population, or tax status. This information will be clearly displayed to the nonprofit as they determine if they are eligible to receive the grant.
- Required – Grant applicants/applications must meet this criterion to be considered for the grant.
- Preferred – Grant applicants/applications should meet this criterion to apply for a grant, but it is not required.
Step 5: Adjust the grant application template
In all applications, Admins can add applications from an expansive bank of questions or remove questions from the grant application to build an application that suits the grant. Application questions:
- Can be marked as required for applicants.
- May have the wording of the question adjusted, but should remain aligned with the question type.
- with pre-set drop-down response options may add a conditional field.
Step 6: Review communications
Email notifications have been established with different automatic triggers throughout the grant workflow. You may disable notifications that you do not wish to be sent for the grant.
Step 7: Select a review workflow
There are three types of review workflows that can be set up for a grant. For each type you can select from your previously created workflows.
- Manual review submission: As applications are received, an admin manually selects which review workflow to apply to the application.
- Single review workflow: All applications for the grant are automatically routed to the selected workflow.
- Dynamic review workflow: Use rules to auto route applications to a selected workflow based on specific criteria in a grant.
Step 8: Publish and share the grant
When your grant is ready, publish it to make it visible to nonprofits via a URL. A grant cannot be edited once it has been published to ensure equitable experiences across all applicants. It can be unpublished.
- Publish publicly - Grants that are made visible on the Nonprofit Hub are discoverable to nonprofits via Grantmatch AI. This setting can be adjusted after a grant has been published.
- Direct link only - Share the direct link with invited nonprofits. The URL can be found on the grant page after it has been published.