


(5 min read)
Effective Targeted Email campaigns often depend on reaching the right supporter with the right message. But as you create your segments for the different versions of an email you’re sending, you may find that some contacts fall into more than one category or that several contacts share the same email address, making it a challenge to ensure those supporters are only receiving ONE version of your message.
You can simplify the process and avoid sending multiple versions of an email to the same supporter by using Email Groups. You’ll be able to group all the versions of your message together and choose the priority order for sending to your list. Once a supporter from your list receives one of the messages from your group, they will automatically be suppressed from the rest of the messages.
Getting started
Before you begin, you may want to first create source codes and a campaign to help you track responses to your emails.
Read more about using campaigns
Watch more about campaigns and source codes in EveryAction
Once you are ready, open Targeted Email from the Sidebar and then select Create New Email > Create an Email Group.
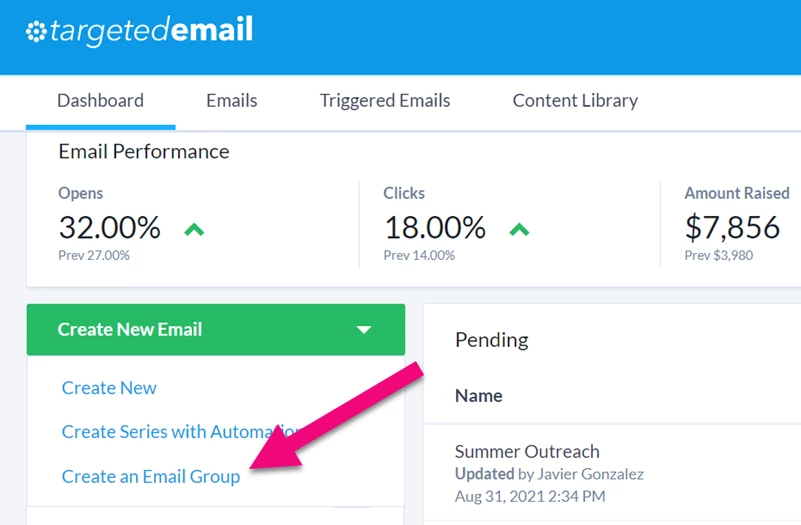
Adding emails to your group
After opening the Email Group feature, you can begin creating emails to add to your group using either the Drag & Drop editor or the Classic Editor.
Read more about using the Drag & Drop editor
Read more about using the Classic editor
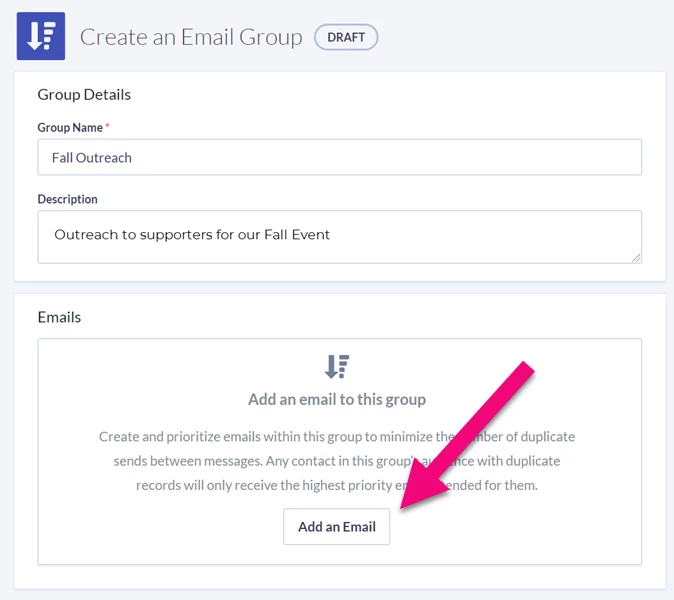
You will not be able to create A/B test case emails for your groups but if you have a pre-existing email you’d like to reuse or copy for this group, you can choose to create a new email From Existing.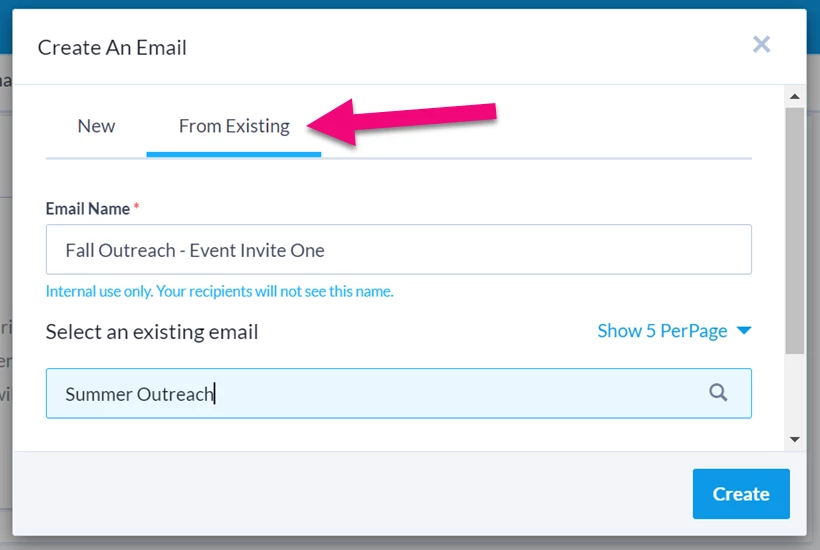
You will then be able to add your audience, compose your messages, and do a final review of the settings on the email before adding it to your group. After saving this message, you can always go back and edit the email or audience if you need to.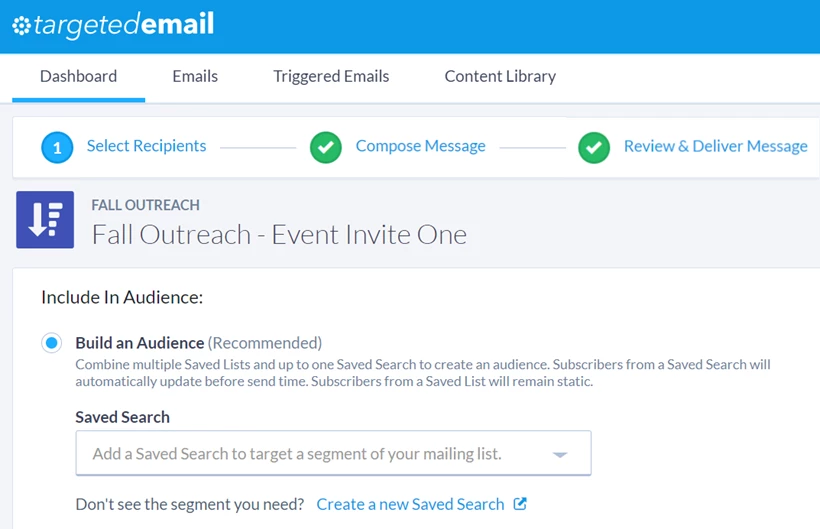
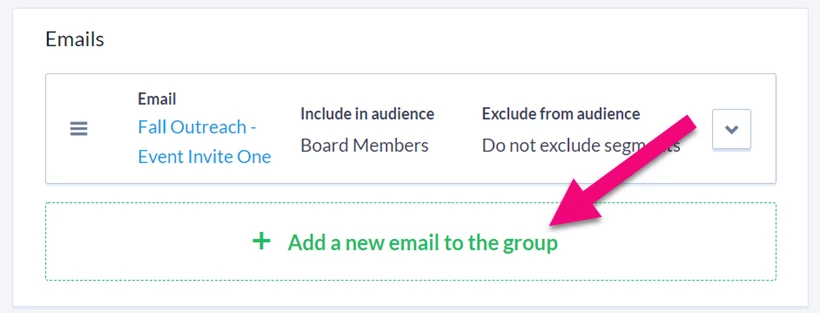
Once you’ve finished and reviewed your settings, Save your first email and then add your next one. You can add up to 10 emails per group.
Prioritizing your messages
Once you’ve added all the messages you want to include in your group, you will need to put them in order of priority. Use the handles to drag the emails into a new place in your list.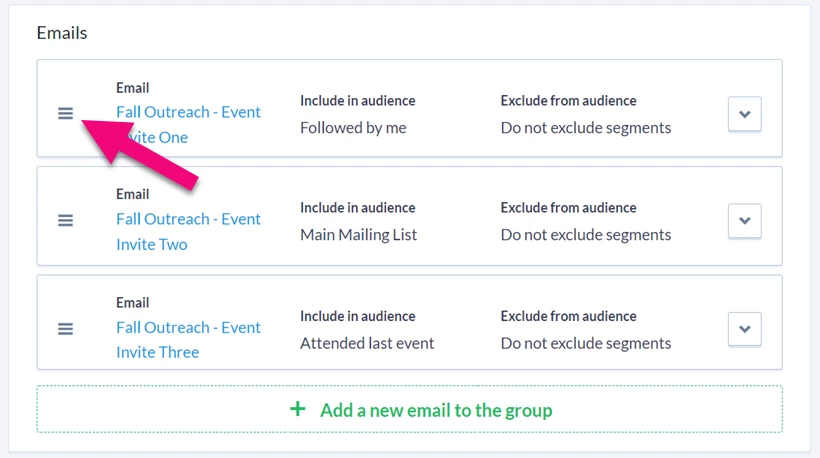
When deciding on the order, you should think in terms of widening circles. You want to reach the people with the narrowest or most important criteria first. As each email is sent, people who received an earlier message will be excluded from the next audience.
For example, if you are planning to invite people to an event, you might want to make sure that the message to your Board members or volunteers is first in the list so those recipients will be excluded from your larger group emails. If you are trying to reach donors, you may want your message to major donors to be at the top of your list so they are excluded from later versions aimed at low-dollar donors.
To confirm the audiences for each email, use Calculate Recipients. If you open the details for each message, you’ll get more details about how many email addresses are duplicates from the previous message and will be skipped. You should recalculate your recipients after you’ve changed the order of your emails since these totals will change as you re-order the emails in your list.
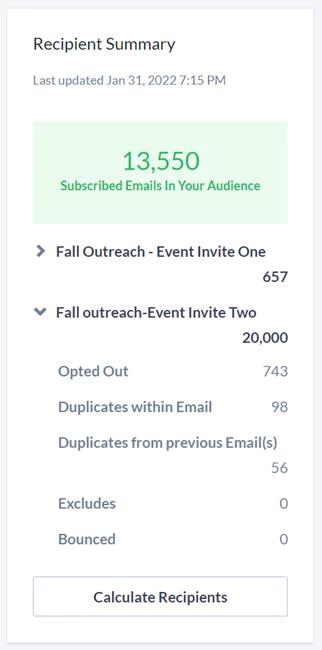
It’s possible that as duplicates are eliminated, you could end up with an audience of zero recipients. Make sure the audiences look the way you want them to before sending. You can adjust your searches or reorder the emails as needed to make sure you are hitting the right audience with each message.
Tracking your email groups
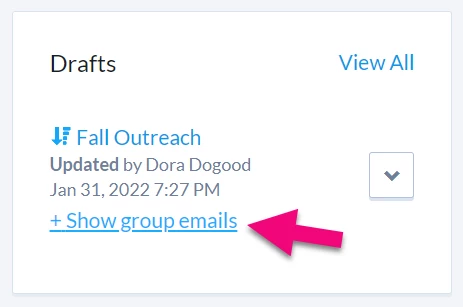
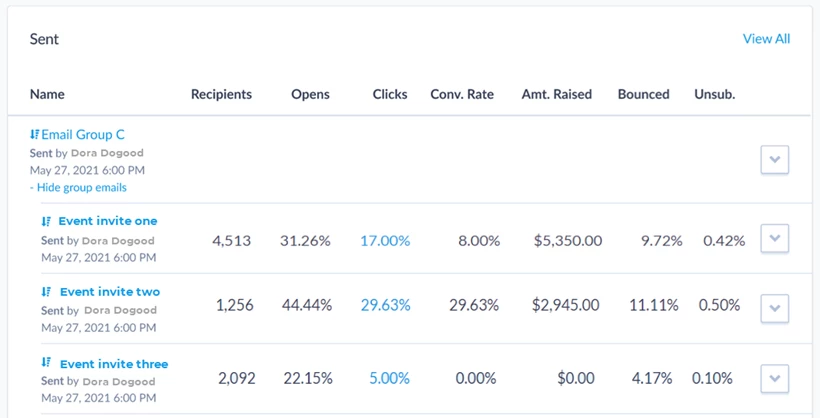
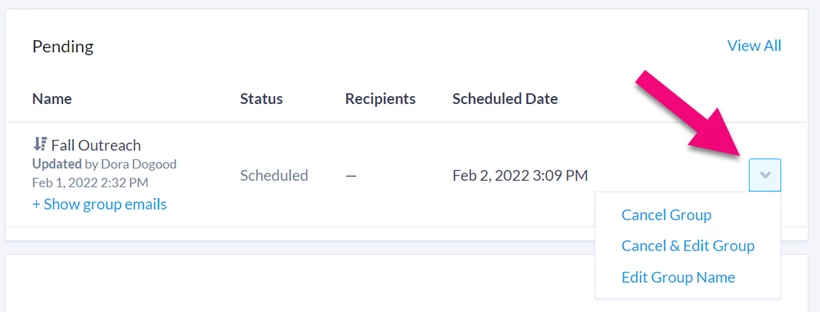
Group emails appear on the Targeted Email dashboard in the Pending, Drafts, or Sent sections depending on their status and are nested under the group name. You can see which emails are part of the group by using Show group emails to expand the section.
You can see final performance statistics for each message in a group by expanding the group in the Sent section.
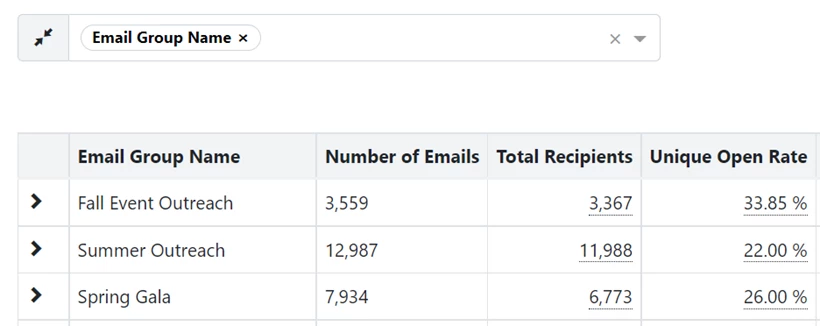
You can also use the Email Comparison Report to see summary metrics for the entire group, as well as individual emails within it. Group by > Email Groups or use the Email Type > Groups filter to quickly find the email group you want to analyze.
Editing or canceling your email groups
You can edit a draft email group at any time. You cannot delete or edit an email during a Send but as long as the email is still Pending you can edit or delete it.
If you want to stop a group from sending at all, you can choose Cancel Group from the dropdown next to the name of the group in the Pending section. If you want to edit the group details or delete one of the emails, select Cancel & Edit Group to cancel the scheduled delivery and open the group details page so you can make changes.
To update a specific email, click on the name from the list. Remember that changing the audience for one email can impact who's included in the audience for other emails, so be sure to confirm the audience changes by recalculating the recipients for the entire group.
You can delete an email from the group using the dropdown.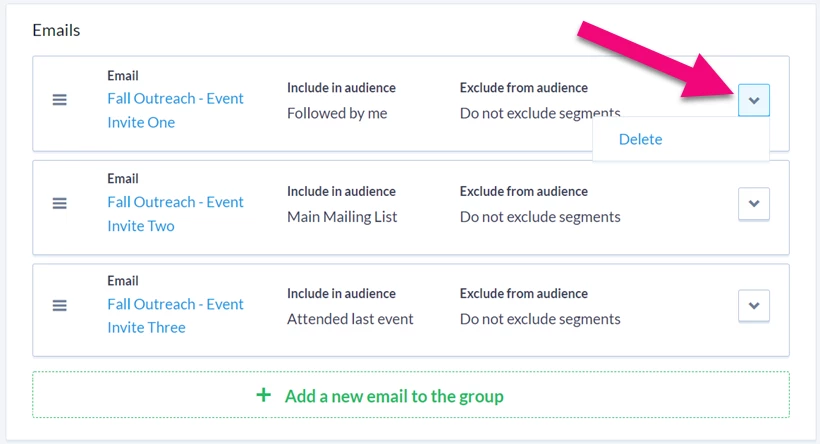
When you're done with your changes, you can then reschedule your delivery.
Looking for training?
Explore this feature at your own pace - join a live training session or watch a recorded webinar by clicking the link below.
How do I how to: create and use targeted email groups? | How does how to: create and use targeted email groups work in EveryAction? | Why can't I how to: create and use targeted email groups? | Where do I how to: create and use targeted email groups in EveryAction? | What is how to: create and use targeted email groups in EveryAction? | How to how to: create and use targeted email groups? | Can I how to: create and use targeted email groups in EveryAction?