

After you've created a beautiful Events page for your upcoming event, you'll need to get the word out so that people can begin RSVP'ing and making plans to attend.
Your Events page includes a nifty feature that lets you seamlessly create an invitation for your upcoming event directly from the page itself; we've included instructions on how to do so below.
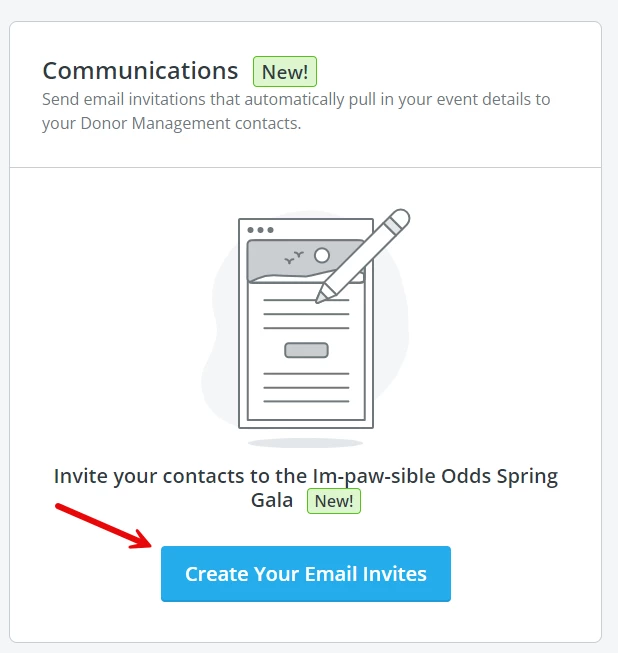
Step 1: Click on the "Communications" tab within your Event Overview

Step 2: Click on the "Create Your Email Invites" button
Step 3: Add or edit any necessary details within your automatically-generated invitation draft
By clicking that button, you'll automatically be brought into Donor Management, midway through the process of creating an email blast.
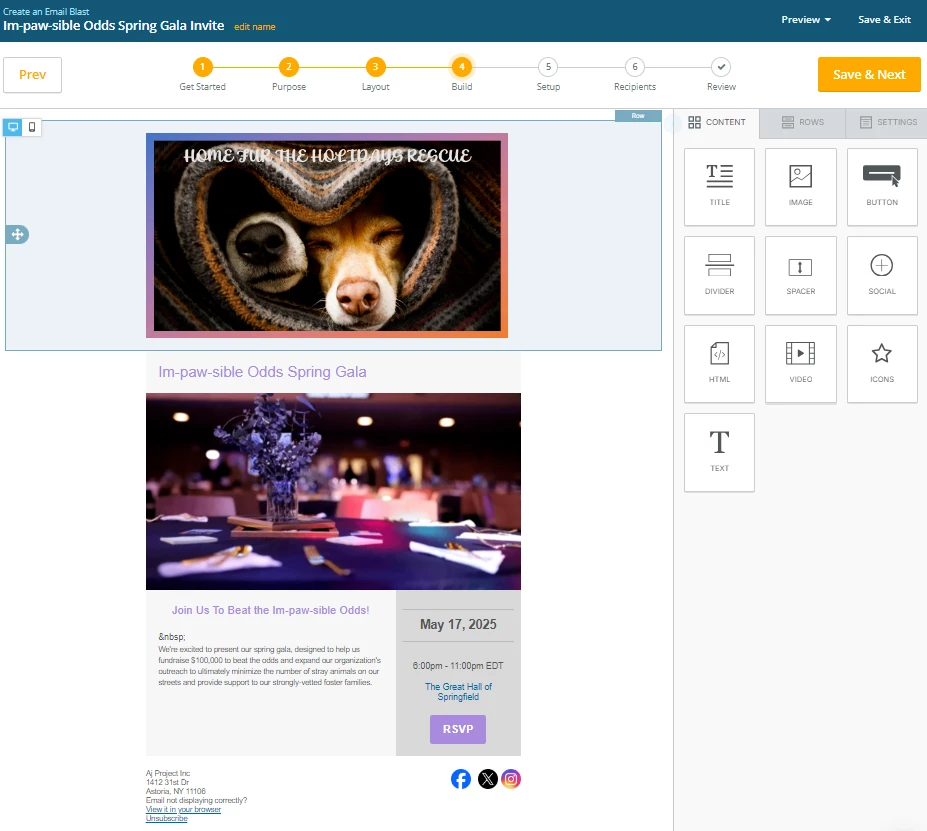
While your event invitation draft should automatically pull in the details of your upcoming event (as well as an RSVP button that links to your Events page), you may want to add or edit some details prior to sending the email out to your contacts.
Once you've made your final edits, click on "Save & Next" in the top-right corner of your screen.

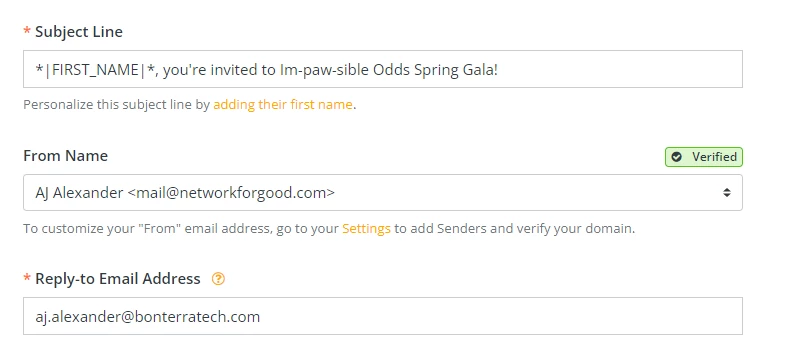
Step 4: Confirm the "setup" details of your email invitation
The next step in creating your email invite will ask you to confirm a few details about the invitation itself, such as what the subject line should be, who the email should be sent from, and which email address should receive any replies from recipients.
You'll also be asked if you'd like to participate in sharing this email with the Network for Good Email Gallery, which makes your completed email invitation available to other nonprofit organizations as a template for inspiration when creating their own email communications.

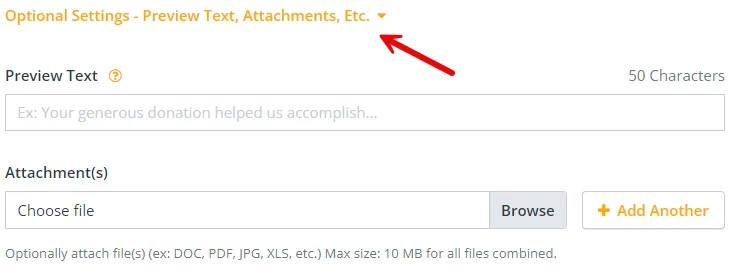
There will also be an option to expand out the "optional" settings for this email invite, which includes modifying the "preview text" or adding an attachment to the email.
Once you've confirmed those settings, click on the "Next" button towards the top-right of the screen.
Step 5: Select which contacts will receive the email invite
For this step, you'll first need to decide if you're sending this email invitation to every contact listed within Donor Management, or if you'd like to instead select a custom list or group to receive the invite instead.
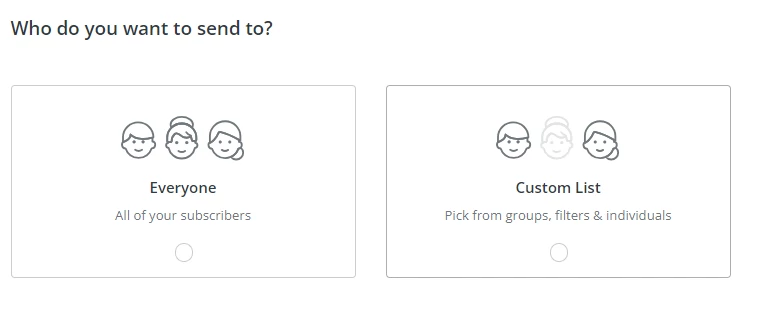
If you pick "everyone," you can continue to the final step by clicking "Next."
If you select "custom list," a set of options should appear.
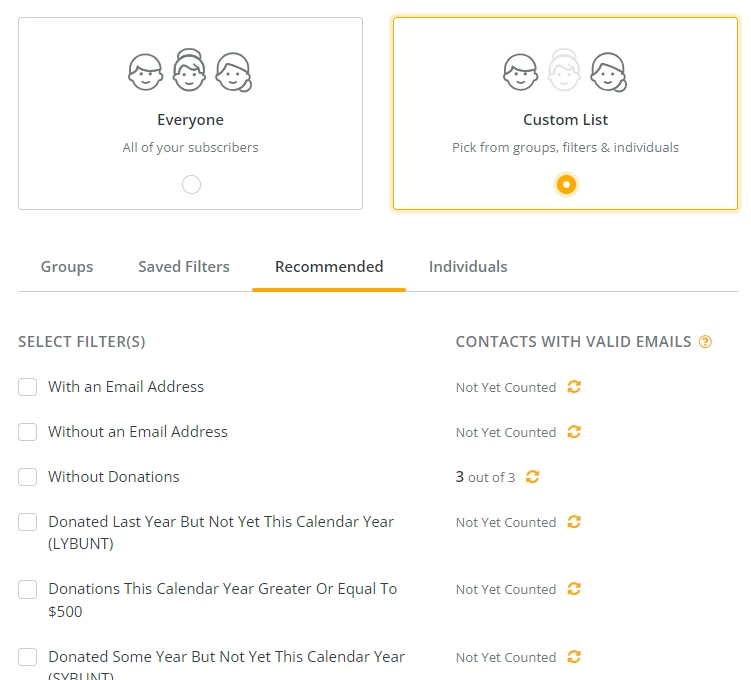
You'll have the option to select one or more groups, filters that you've either saved or are considered "recommended," or individual contacts to send this message to - be sure to review each option carefully and select the one that best suits your event's audience.
Once you've finalized your audience, you can move onto the final step by clicking "Next."
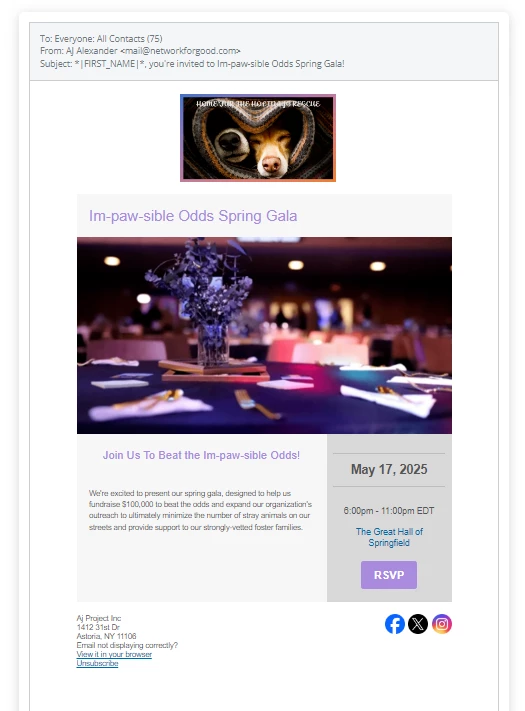
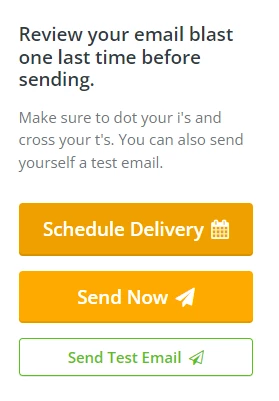
Step 6: Review and send your event invitation.
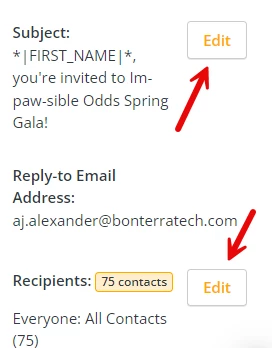
In this final step, you'll be asked to review a final draft of your email invitation, to make sure that everything is to your liking.
If you need to update or edit anything, you can click on any of the "edit" buttons next to the corresponding section, or you can click on one of the steps at the top of the screen to return there for further adjustment.

Once you've done your final review, you can either send yourself a copy of the event invitation as a "test email," schedule the email for delivery at a future time or date - or send that invitation to your recipients now!
What else do you want to do?
-
How do I use automatic reminder emails within my Events pages?
-
How do I authenticate my email to comply with anti-spam requirements?
Not what you're looking for?
Go back to the Feature Overview.
How do I send an event invitation email in Network for Good? | How do I invite contacts to my event page? | Where is the Create Your Email Invites button? | How do I choose which contacts receive my event invite? | Can I schedule my event invitation email? | How do I edit the RSVP button in my event invitation? | How do I send a test email for my event invite?